This article will walk you through the steps to replace a bad U20 chip in the PhysioMonitor.
You will need:
- Philips head screwdriver
- Small flat head screwdriver
- Tweezers for microchips (Supplied with u20 purchase)
1. Unscrew the 4 screws on the bottom of the PhysioMonitor

2. Remove the top cover

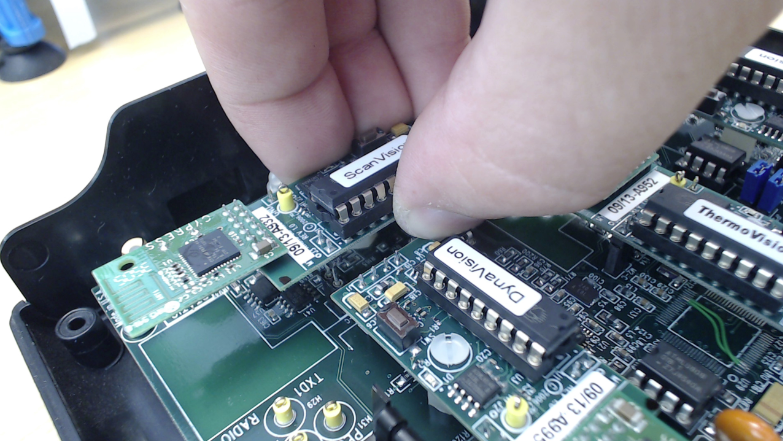
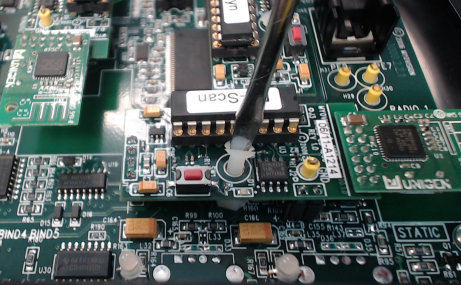
3. PhysioMonitor Layout
The U20 chip is located below the ScanVision radio and next to the DynaVision radio.

4. Remove the plastic retainer screw
Note: If you don't see this screw, disregard and move to step 5.

5. Remove the radios
Grab both sides of the radio and pull straight up. You may need to wiggle lightly while lifting. Remove both ScanVision and DynaVision radios.
Note: When removing the radio, be mindful of the pins on the bottom of the radio as they can bend very easily.
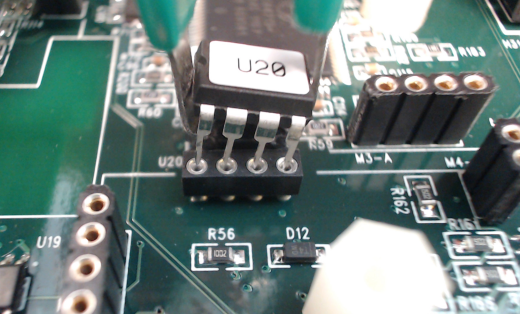
6. Remove the U20 chip
Using your tweezers for microchips, lift the U20 chip straight out of the board. You may need to rock back and forth while pulling up.
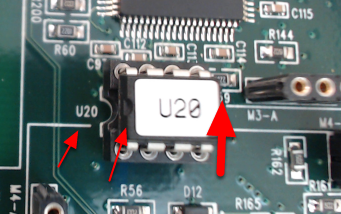
7. Install new U20 chip
Line up the new chip and gently press it into place, being careful not to bend the pins.
Make sure that the chip is in the correct way. When looking down at the PhysioMonitor the U20 label on the chip should be right side up. If there is no label for whatever reason, know that the small divot on the left side of the chip should be on the same side as the "U20" on the board.
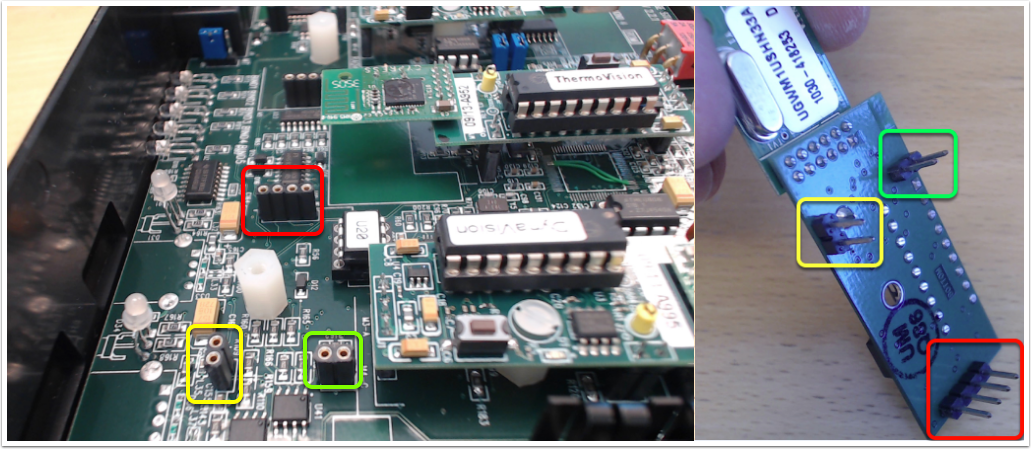
8. Reinstall the radios
Reinstall the radios in the same spot they came from.
Line up the pins and gently press straight down.
Note: When installing the radio, be mindful of the pins on the bottom of the radio as they can bend very easily.
9. Reinstall the plastic retainer screw
Install the retainer screws If you had them.
10. Replace the bottom 4 screws
