Table of Contents
- Summary
- What is a Protocol?
- How Do I Build a Custom Protocol?
- How Do I Set My New Custom Protocol as the QuickScreen?
Summary
This article will discuss what a protocol is, how to build a custom protocol, and how to choose which protocol gets used for the Quick Screen.
What is a Protocol?
A protocol is a file that is saved in the MyoVision folder. on the root of the computer (C:\WinScan98), that tells the MyoVIsion software which types of scans you want to do (Dynamic, DynamicROM, Static, Thermal, Range of Motion) and what sites you want to scan during the exam.
The MyoVision software has a built-in feature that allows you to make your own custom protocols to be used with the built-in protocols. This feature can also be used to rebuild built-in protocols that accidentally get deleted.
How Do I Build a Custom Protocol?
The MyoVision software has a built-in tool called the Protocol Wizard. The wizard will guide you through the process of creating your own protocol.
How To Start
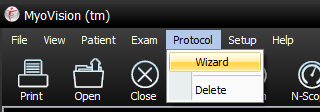
- In the MyoVision software, open the Protocol menu and select Wizard
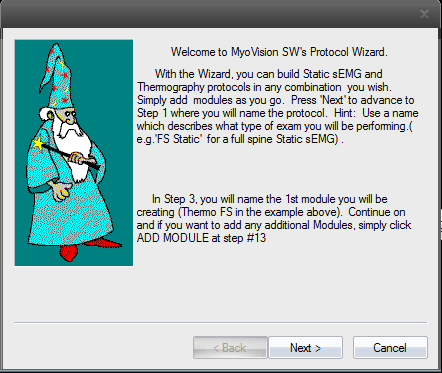
- Read the first box for a deeper understanding of setting up protocols. Click Next when you are ready to proceed.
- Enter in a name for your New Exam Protocol
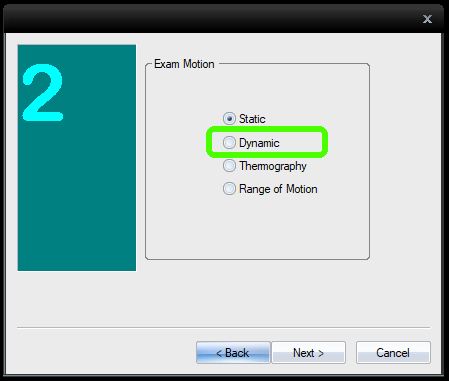
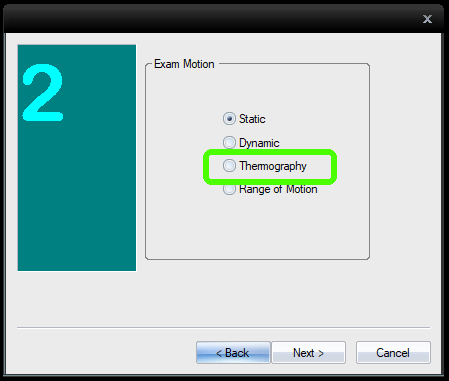
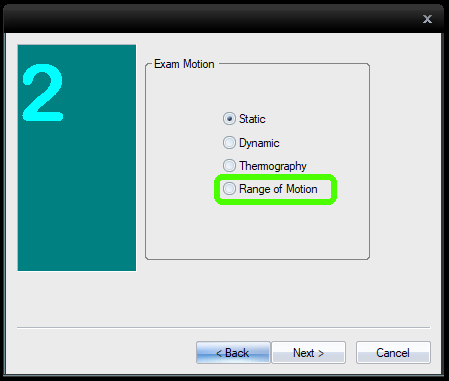
Click Next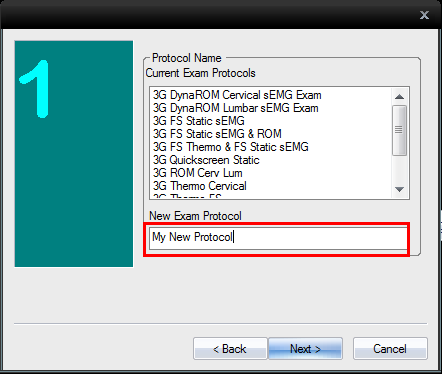 On the next screen you will be prompted to select which type of "Exam Motion" you would like to do first.


 On the next screen you will be prompted to select which type of "Exam Motion" you would like to do first.
Click the corresponding motion in the tabbed menu below to see how to setup that motion in the Protocol Wizard.
**IMPORTANT: If you want Thermography as part of your protocol, it must be the first Exam Motion.
Static Module
Follow the instructions below to add a Static Motion to your protocol.
- To add Static sEMG as part of your protocol, select Static and then click Next.

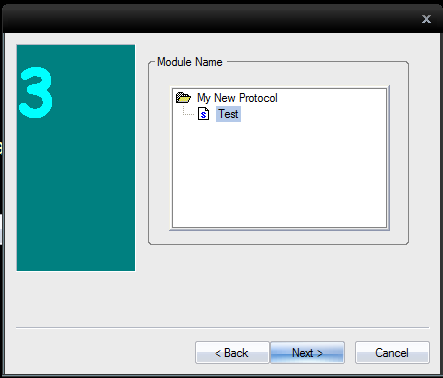
- You will need to name the module. It helps to give the module a name that describes the motion. For the example protocol the name is "test".

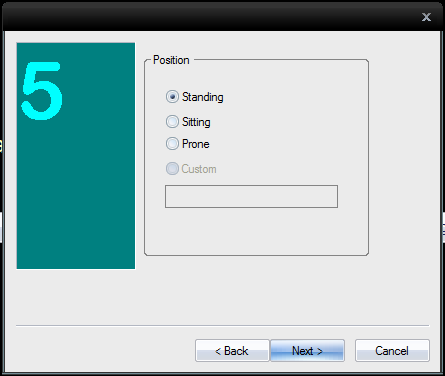
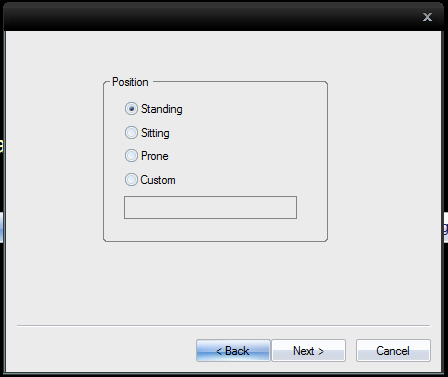
- Choose the position that the patient will be in, then click Next.
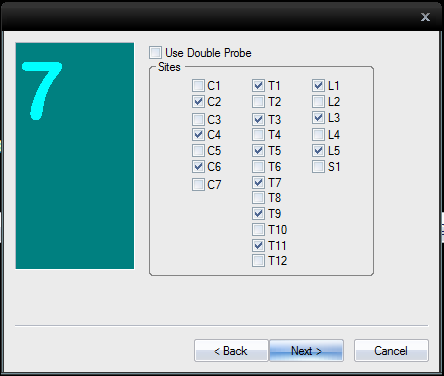
- Select the sites you want test, then click Next.
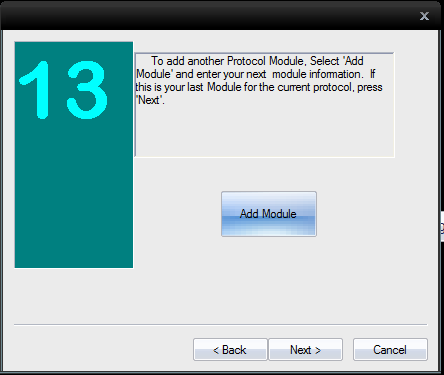
- Click the Add Module button if you want to add another type of Exam Motion or click Next > to finish building your protocol.


Dynamic Module
This portion of the guide will go over adding the Dynamic Module to your custom protocol.
- To add the Dynamic Exam Motion select Dynamic from the list. Then click Next.
- You will need to name the module. It helps to give the module a name that describes the motion. For the example protocol the name is "test".
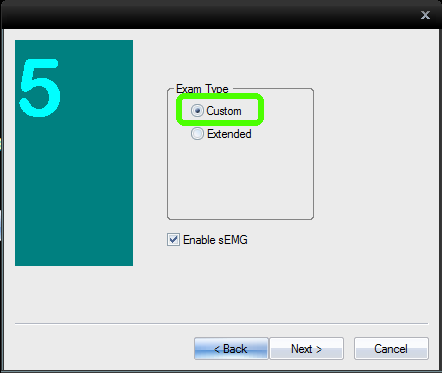
- On the next screen you will want to choose Custom.
- Choose the position that the patient will be in during the exam.
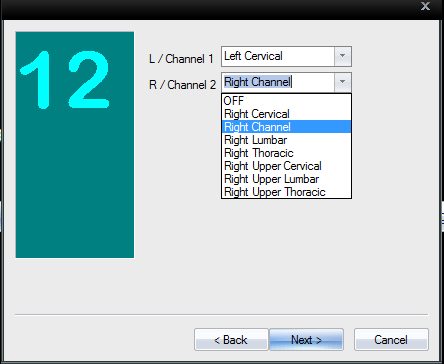
- Select the number of channels that you'll be using during the exam.

- Set the X and Y scale for your exam.

- Select which muscle group each channel will be focused on.
- Click the Add Module button if you want to add another type of Exam Motion or click Next > to finish building your protocol.


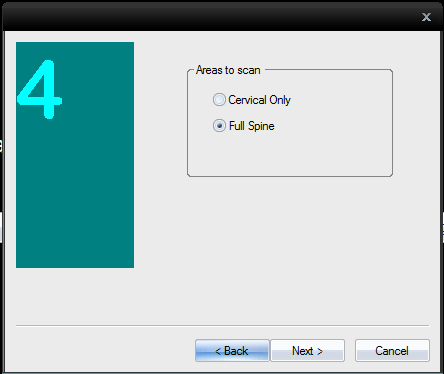
Thermography Module
If you want to add Thermography to your custom protocol make sure that it's the first Exam Motion that you select.
- To add Thermography as part of your protocol, select Thermography and then click Next.
- You will need to name the module. It helps to give the module a name that describes the motion. For the example protocol the name is "test".
- Select whether you want to just scan the Cervical or the Full Spine.
- Click the Add Modules button to add another module to your custom protocol, or click Next to continue.


Range of Motion Module
This portion of the guide will go over adding the Dynamic Module to your custom protocol.
- To add the Range of Motion Exam Motion select Range of Motion from the list. Then click Next.
- You need to name the module. It helps to give it a name that is descriptive of the motion. We use "test" here
- Click the Add Module button if you want to add another type of Exam Motion or click Next > to finish building your protocol.


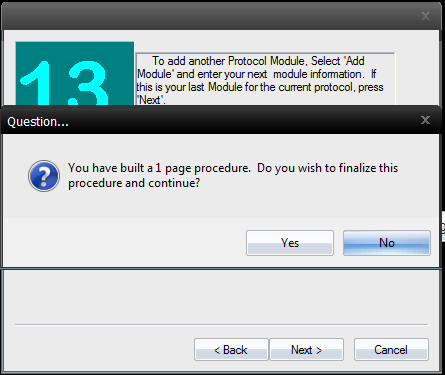
Finalize
If you clicked Next instead of adding modules, you will be asked if you want to finalize the procedure.
Click Yes
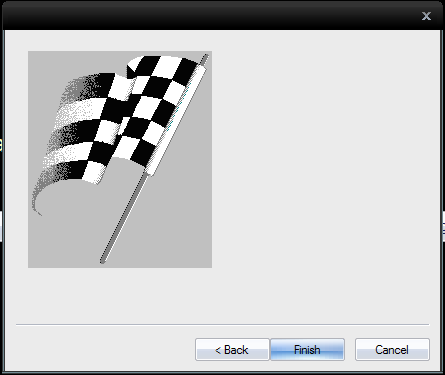
- Click Next on this section
- Click Finish


How Do I Set My New Custom Protocol as the QuickScreen?
Once you have built a custom protocol you can set it to be the protocol used in the QuickScreen Exam feature. This allows you to quickly demonstrate specific types of exams and results repeatedly. To start a new QuickScreen exam you can simply push F5 at the start screen of the software.
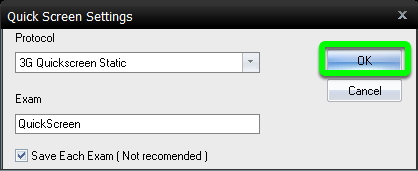
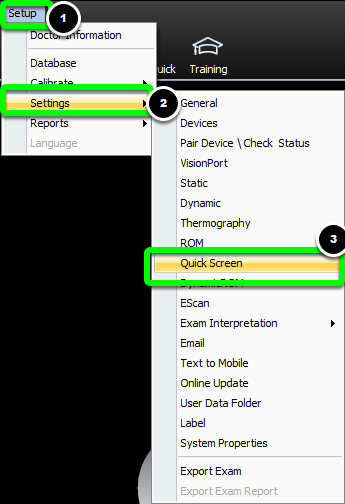
- Open the Setup menu, go down to Settings, and select Quick Screen.
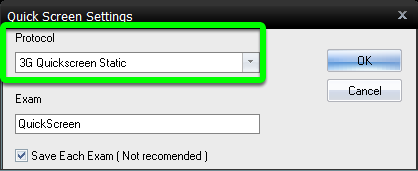
- Select which protocol you want to use for the Quick Screen from the drop-down menu.
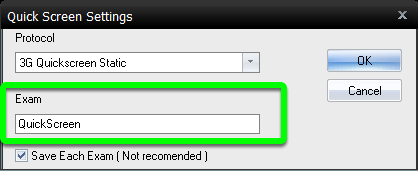
- If you're going to be saving your Quick Screen exams you can decide how the exams are named in the "Exam" box.
- In the checkbox below the "Exam" box you can decide whether or not you will want to save every Quick Screen exam done.
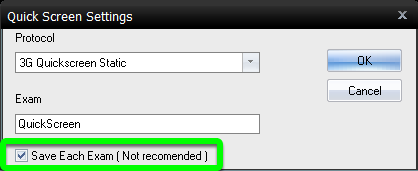
- Click OK to save your settings.