The Patented MyoVision ScanVision 5 Electrode Adaptive Electrode Static sEMG was designed and patented with a provide the best skin contact possible through the use of a moving ground. This moving ground allows the electrodes to always make solid skin contact no matter what the curves of the body, and was inspired by the Lunar Landing Module's suspension system. By utilizing 5 electrodes, it allows the device to perform two measurements at the same time, cutting scan time in half in comparison to all other systems.
It is very important to not get too worried about electrode placement, as the device is gathering a general reading in an area of approximately 3 inches about the placement of the probe, and our real interest is in the overall pattern about the spine. By simply breaking the Cervical, Thoracic and Lumbar spine into even spacing, using basic simple landmarks as starting points, and then performing evenly spaced readings for all three regions you will obtain excellent data. What is most important is to get to know the basic landmarks, to make sure the label on the device is always facing up (do not turn the device sideways), make sure all 5 electrodes are touching the skin, making sure you are touching down in the paraspinal region (never touch the probe to the spine's vertebrae, but instead approximately 1 to 2 inches from the center of the spine on left and right sides of the spine. Also, always perform the test on skin, not hair (why we recommend you test below the ear for the C2 reading). Let the software's voice prompt you for placement. It is actually quite simple!
For a video which helps avoid the most common problems most run into, please visit www.myovision.com, go to Training, Online Training, ScanVision Certification Course and watch the video "How to get perfect MyoVision Static scans forever", or click HERE. to visit the web page.

To perform the test properly, remember the following:
- Always turn the volume up with your computer's speakers. The voice prompts tell you where the place the electrodes. They are not announcing where you placed the electrodes, but are used to tell you where to place the electrodes.
- When placing the electrodes (e.g. at T1), make sure you are placing the ground electrode at the level that is announced. Some confuse this with older systems where the two two electrodes were always placed where the software requested. Now, always place the ground electrode, as in the example described, at T1.
- The device is measuring a region of around 3 inches around the probe, meaning you do not have to obsess over accuracy of placement. Simply break the cervical spine into cervical thoracic and lumbar, and perform the test so that you essentially do a combination of splitting the cervical region into even areas, and use major landmarks to remember where to position the electrode.
- NEVER place the device on the spine (the vertebrae) itself, but to left and right of the vertebrae. When using the single probe or dual probe device, touch down the device on the paraspinal muscles. These can be easily "palpated" and are approximately 1 to 1 1/2 inches from the center of the spine (2.5-3.5 cm).
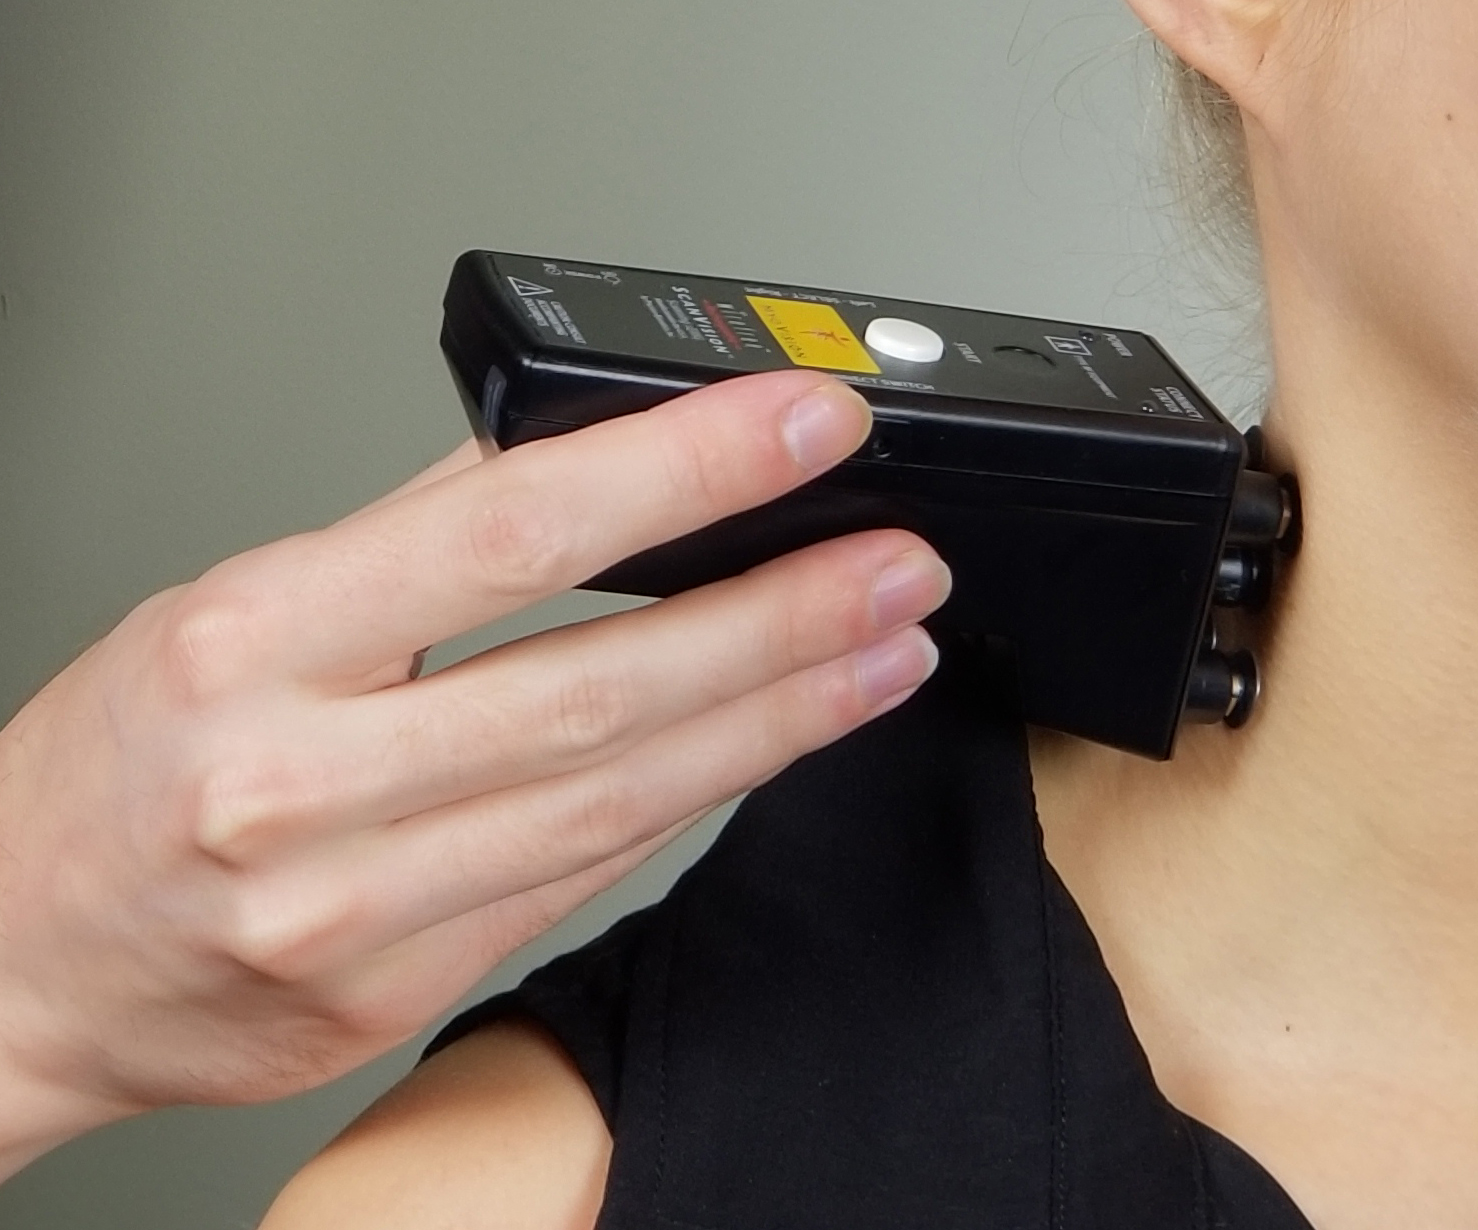
- For the first reading (at C2), it is important to always place the device on skin, not hair. It is important to always place the device under the ear, as that placement provides an excellent measure of the muscles which control the cervical spine without the issues of hair blocking skin contact.
- Always make sure all 5 electrodes are touching the skin. At first, when you touch down, move the rear of the probe up and down until you get the "feel" for all the electrodes touching down. It is very easy, and usually after the first full test it is obvious how to use the probe.
- Remember to always make sure labels face UP, meaning that the device is oriented so the top and bottom sets of electrodes are horizontal when compared with the floor.
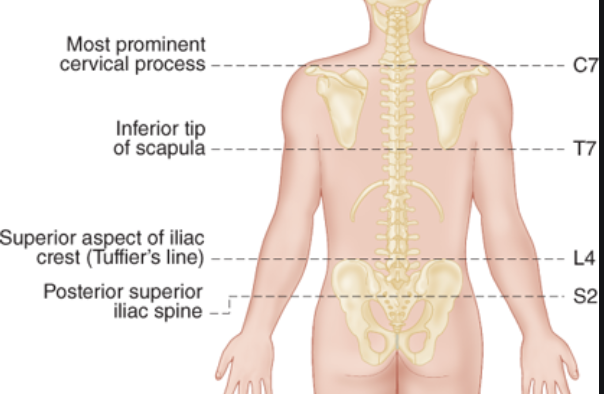
- Landmarks to be aware of: T1 (shown as C7...they are very close) is where the bony prominence right at the base of the neck before the transition to the Thoracic spine. The "bra line" is a good landmark (between the lower part of the scapula for T7. L5 is at the bottom of the curve of the lumbar "lordosis" or curve. The top of this curve is where T12 is typically found. In this chart, think of C7 as T1, as we are measuring a large area around the device, so keeping it simple is best.
- Most importantly! Since we are most interested in the overall pattern of muscle activity about the entire spine, the exact placement is not critical.
- Note: If you are performing the Quickscreen function (either by pressing the number "5" to skip adding a patient's name to quicken the process at a screening, OR by selecting the Quickscreen Test when selecting the test protocol to follow, you perform only three measures: C2, T1 and L5. Due to the fact that C2, T1 and L5 are "transitional' areas, we actually get some valuable data even without the mid thoracic spine. It is always preferable to perform a full spine test, but if time is an issue, and you cannot have patients in gowns or remove clothing to perform the test, you will obtain a surprising amount of valuable data from these three readings. Due to the fact a large percentage of the population does have lumbar issues, it is recommended to ask the patient to raise the shirt so you can test the lumbar spine (the software lets you skip the lumbar spine for those wearing a dress or those not comfortable raising their shirt by pressing and holding the button on the probe for 3 seconds after finishing the T1 reading on the left).
- When testing, press and release the button to turn on the device. When the software announces a spot. Touch the probe's electrodes to the quickscan pad (with the pad placed on top of the jar, not in the jar), touch down to the skin and wait for the reading to suddenly drop. When it does, press and release the button again and HOLD THE DEVICE AGAINST THE SKIN until the software announces to move onto the next site. After you have pressed and released the button, the software is "autoscanning" which means it is looking for a stable reading. If the reading does not drop quickly, it means you have bad contact with the skin, or are too close to an electrical interference noise source (like a monitor, TV or ungrounded computer (no 3rd prong on the computer's AC Adapter). Simply pick up the device, and move slightly over and touch down again. If the readings still do not drop, move back 2 feet from the screen and try again. The device was designed to be wireless so you could avoid such sources of electrical interference although the device was designed to eliminate this electrical interference in 99% of situations.
Practice makes perfect! Do not analyze the data too closely until you have performed at least 10 tests.


