Table of Contents
- Customizing the EScan Message
- Add the Patient's Name to the EScan Message
- Reset the EScan Message and Text
Customizing the EScan Message
This article will guide you through the steps to customize your E-Scan message.

Click on the instructions inside the tabbed menu:
Open Escan Settings
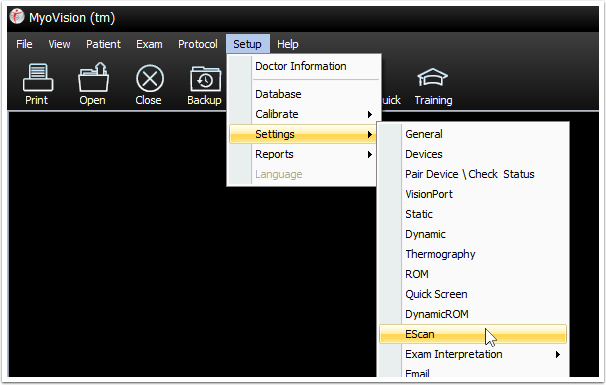
- Click on Setup, hover over Settings, click on EScan.

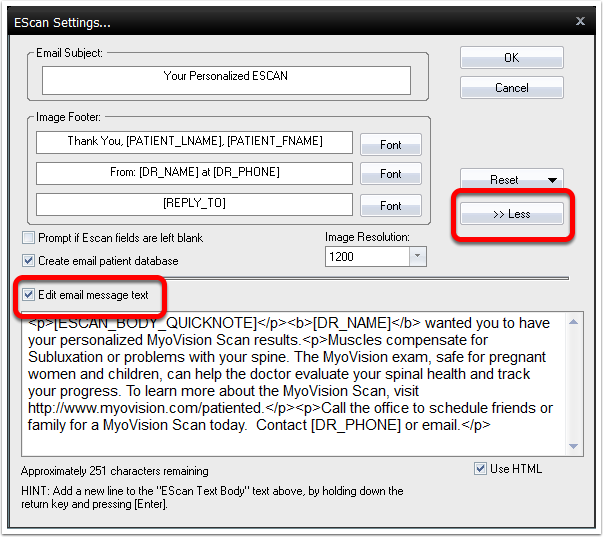
Customize the EScan Message
This window will allow you to change: the EScan email subject line, the footer text of the image, and the text in the eamil that accompanies the EScan image.
NOTE: Avoid changing any information contained in brackets. These are fields that are populated with information from different parts of the software.
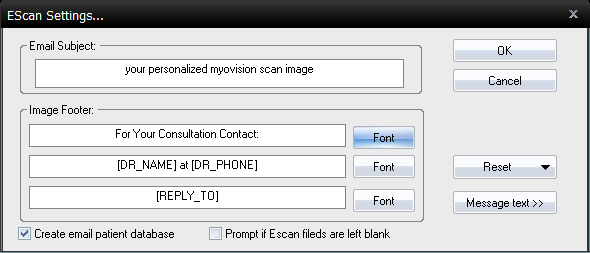
To change the body of the email:
- Click on Message Text
- Check the box next to Edit email message text
Once again, avoid editing anything in brackets [ ] or angle brackets < >.
To denote a new line in the email enter "
" without the quotation marks.

Add the Patient's Name to the EScan Message
- Inside the MyoVision software, click Setup in the menu, go to Settings, then EScan.

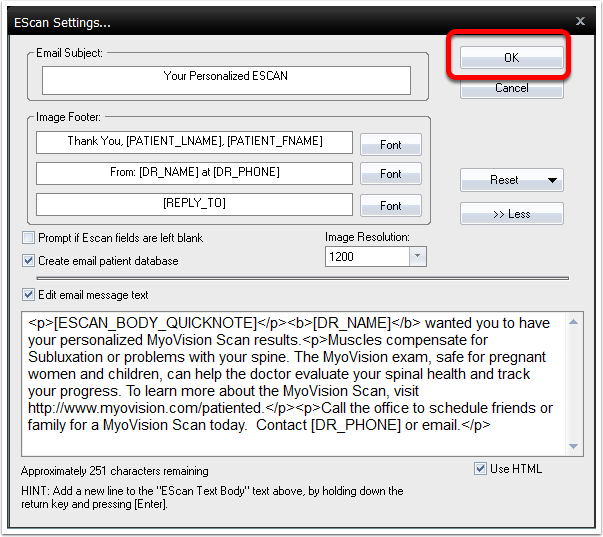
- The EScan Settings window will open, allowing you to customize 1) the display text on the scan image and 2) the text of the email that accompanies the Scan.
- Edit Image Footer: To add the patient's first name, type: [PATIENT_FNAME] where you want the patient's first name to appear. To add the patient's last name, type: [PATIENT_LNAME] where you want the patient's last name to appear.
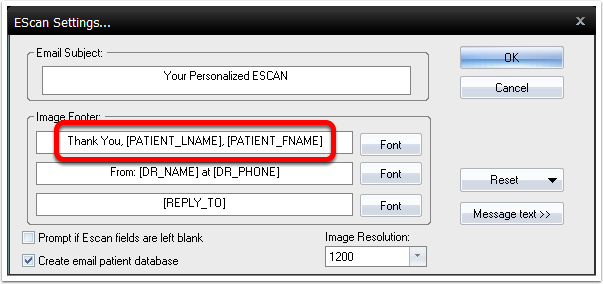
- Edit Image Footer: To add the patient's first name, type: [PATIENT_FNAME] where you want the patient's first name to appear. To add the patient's last name, type: [PATIENT_LNAME] where you want the patient's last name to appear.
- To edit the text that accompanies the scan: Click the Message text button. Check the checkbox for "Edit email message text" to enable editing.
- When you've finished making changes, click the OK button.


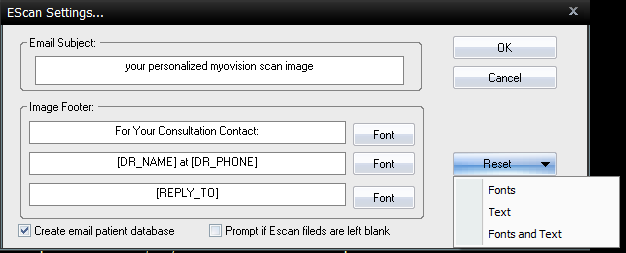
Restore to Default Settings
If you need to reset the message back to default settings:
- Click on Reset
- Click "Yes" to the prompt
- Select if you want to reset Fonts, Text, or Fonts and Text
- Click "Yes"