Summary
This document shows you how to setup and configure a Network Database for your MyoVision software. A network database allows you to access the database of patients and exams on any computer running MyoVision and is connected to the network.
Definitions of terms used
- Server - the computer or server that contains or will contain the patient database
- Client - the computer(s) that have or will have MyoVision installed and will be looking to the "server" for the patient database
Table of Contents
- Create a backup of your database
- Install MyoVision on "server" computer
- Setup Firewall Inbound Rule exceptions on "server" computer
- Install MyoVision on "client" computer
- Configure "client" computer to look for the network database
Before you Begin
- Make sure the Windows account you are logged into has Administrator privileges
- Check Administrator Privileges if you are unsure.
- IMPORTANT: Make sure Windows OS is fully updated before installing MyoVision.
- To check if you are fully updated, go to the Microsoft support article here: https://support.microsoft.com/en-us/windows/install-windows-updates-3c5ae7fc-9fb6-9af1-1984-b5e0412c556a
- Determine which computer is the "server" computer. We recommend the "server" computer either be an actual server, or the computer that exams are most frequently performed on.
How to setup a MyoVision Network Database
1. Create a backup of your database
- Follow the instructions in our Backup and Restore a Patient Database support article.
- If you need to merge patient databases, follow the instructions in How To Merge Multiple Databases then create a backup of the merged database.
- The .BU2 file will need to move to the server computer if it is not already there. We recommend using a flash drive to transfer the file.
2. Install the MyoVision software on the "server" computer
- Download the software at: https://www.myovision.com/download.html
- Run the installer
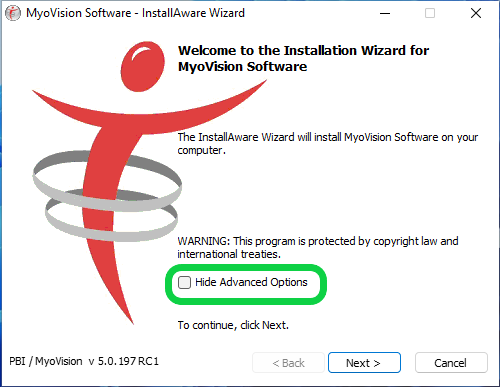
- Uncheck the box next to "Hide Advanced Options", click "Next"
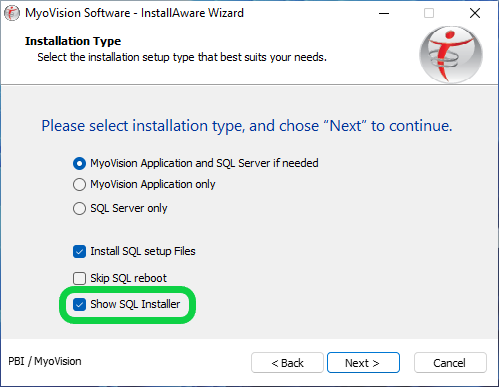
- Check the box next to "Show SQL Installer", Click "Next"


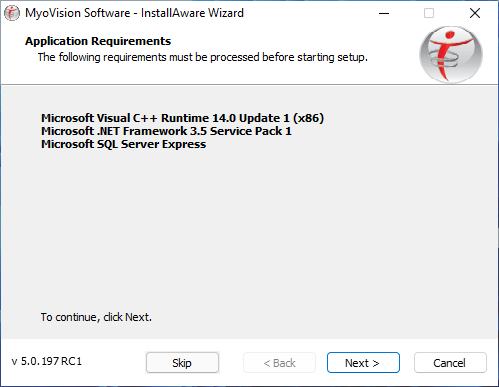
- Click "Next" to install pre-requisites
- Check the box next to "I accept the license terms." and click "Next"

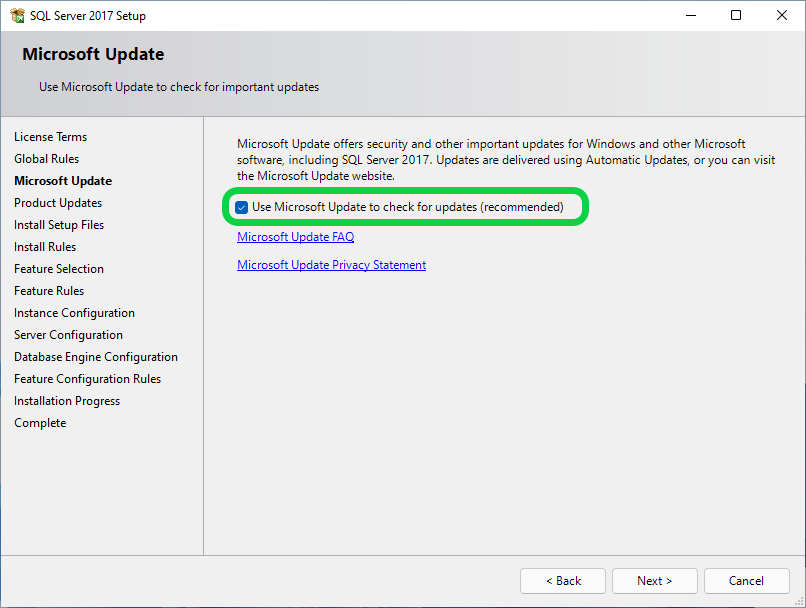
Check the "Use Microsoft Update..." box and click "Next"
- "Windows Firewall" will likely give a warning, but it's expected - click "Next"
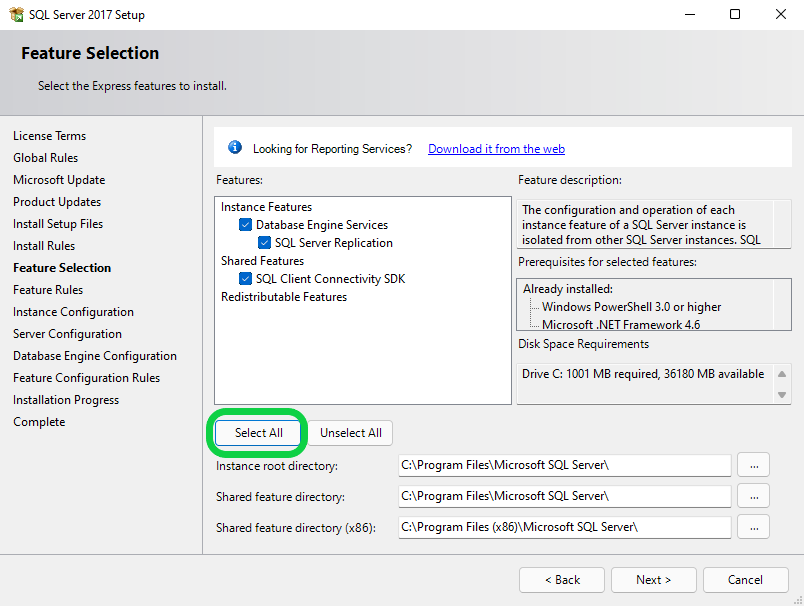
- Click "Select All" then click "Next"
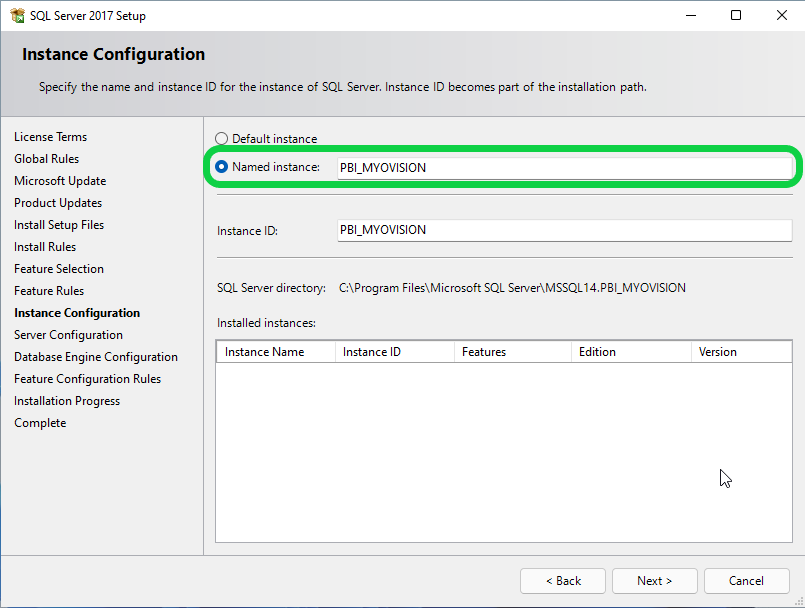
Check that "Named Instance" is "PBI_MYOVISION", click "Next"
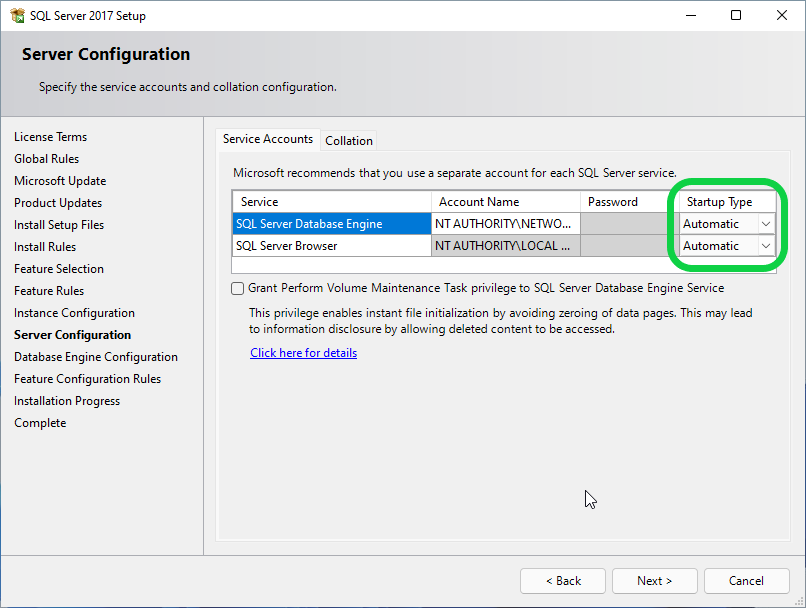
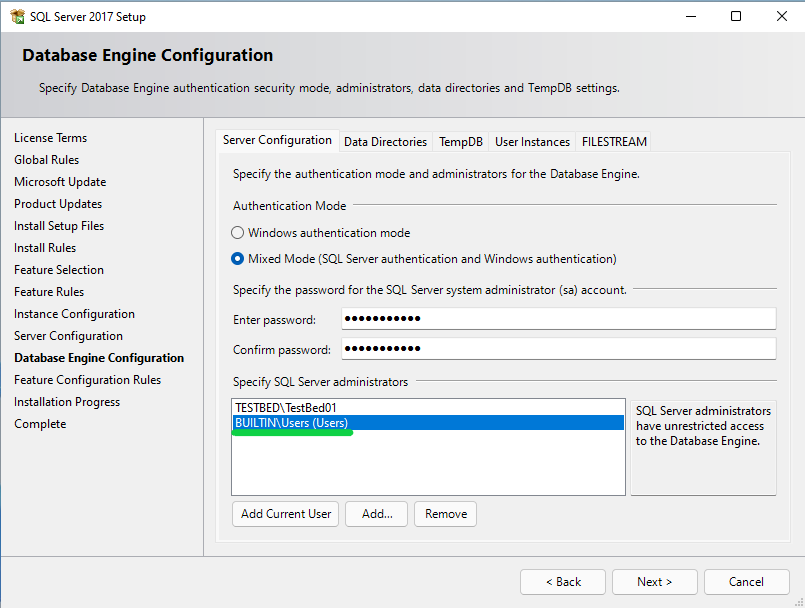
- Make sure "Startup Type" is set to "Automatic" for both Services


- Ensure that "Mixed Mode" for is the Authentication Mode.
- Do not change the password
- If you accidently deleted or changed the password, set the password to MyoVision01 for both fields. Be careful typing/pasting the password into this field. There is no way to change it after installing!
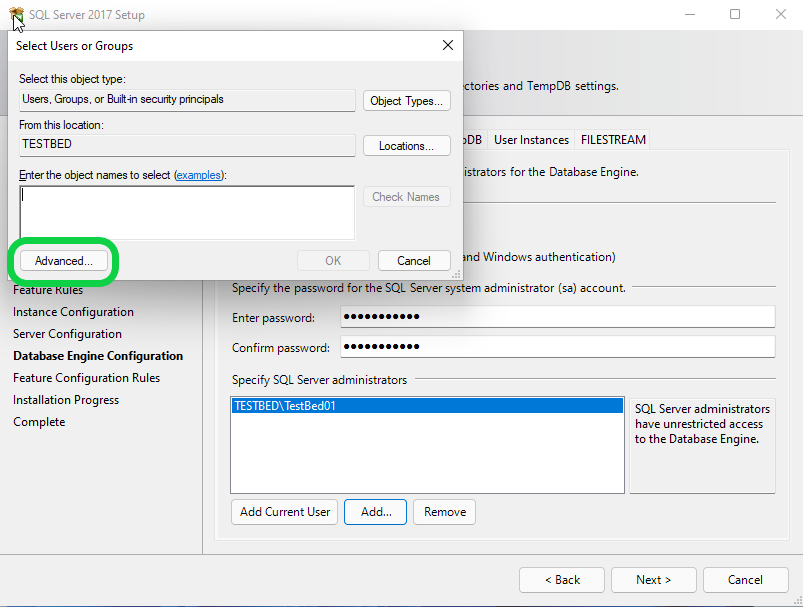
- Then click "Add"

- The following screen will pop up. Then click "Advanced"
- Click "Find Now"
- Click on any name in the search results and quickly type "Users" and select that result. Then click "OK"
- Note: If a "Users" account does not exist, look for Domain Users or other group that ends in Users
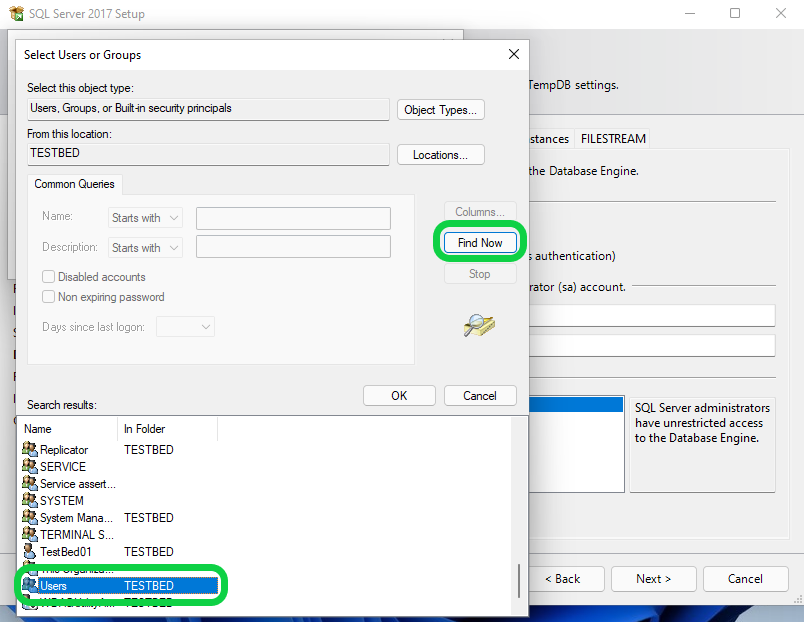
- Click "OK" on both "Select Users or Groups" windows.
- Once you're back to the installer, make sure the "Users" account is added before clicking "Next".
- It may take a moment to add and the name may be different if a "Domain User" or other group user account was added.
- It may take a moment to add and the name may be different if a "Domain User" or other group user account was added.
- IMPORTANT (ONLY IF ERROR MESSAGE APPEARS, Otherwise skip to SQL Install complete): Some user accounts are not considered valid by SQL Server, if an error message appears that the user account is not valid when clicking "Next" then follow instructions to remove the current user account.
- Select the user account
- Click "Remove"
- The only account left should be the user account added (Example: BUILTIN\USER), click "Next"


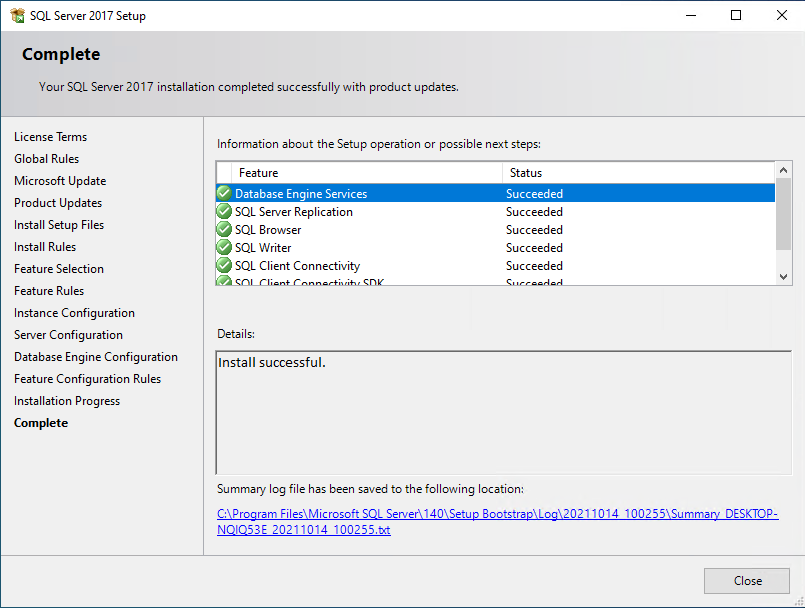
- Once the installation is complete, SQL installer will show an "Install successful" message. Click "Close"
- Once the Prerequisite Programs are installed, the MyoVision installer will start. Click Next through each selection
- Choose the option that best fits your install. Click on the first or second option, then click Next.
- Note: You will not be asked for your Registration Key during the install so if you do not have it you can still choose the second option.
- Choose the option that best fits your install. Click on the first or second option, then click Next.


- Select your location, then click Next.
- The Install is ready to start. Click Next to proceed.
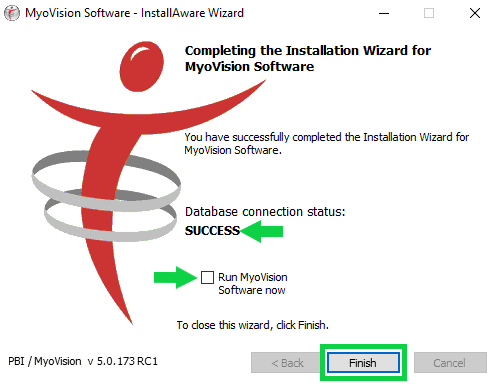
- Once the MyoVision software is installed, a confirmation window will appear with the Database connection status displaying Success.
- Check the box next to "Run MyoVision Software now".
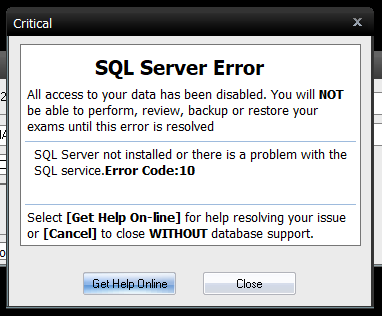
- If your Database connection status does not say Success, run the MyoVision software and check to see if an SQL Server error appears.
- If you get an SQL Server error call Technical Support at 1-800-969-6961 Opt 2
- If you get an SQL Server error call Technical Support at 1-800-969-6961 Opt 2
- Restore the database on "server" computer using the previously retrieved .BU2 file from Step 1
- Follow the steps in our support article Restore a Patient Database

3. Setup Firewall exceptions on "server" computer
- This setup is only if the server computer uses Windows Defender Firewall.
- We do not recommend third-party firewall or anti-virus programs as they often interfere with Microsoft SQL Server
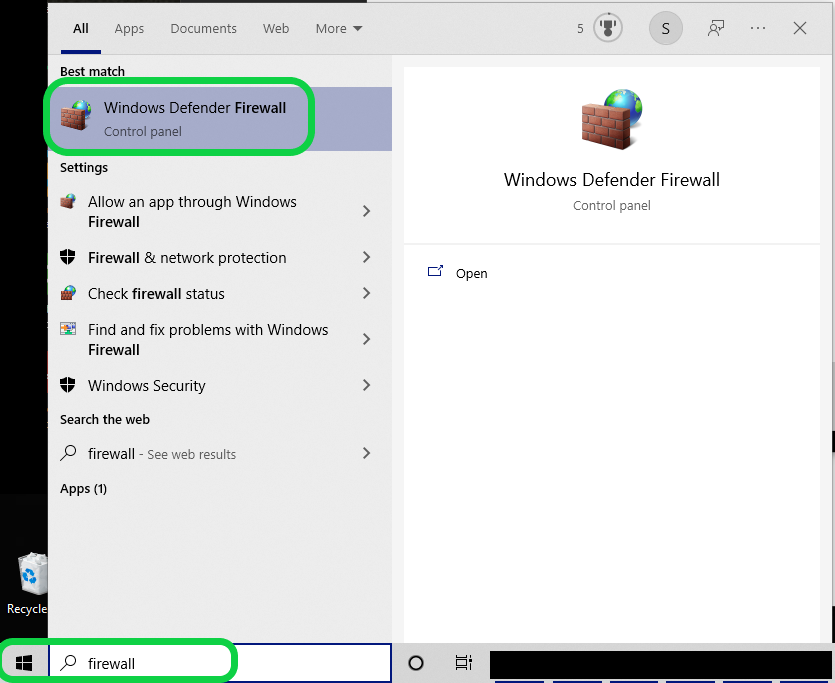
- If the "server" computer uses a third-party firewall, refer to their support for adding exceptions"Click on the Windows icon and type "Firewall"
- Choose "Windows Defender Firewall"

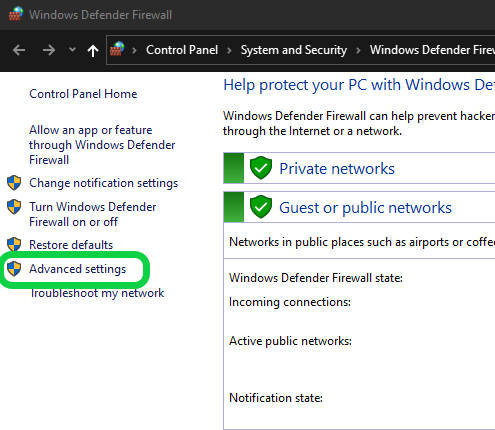
- Click on "Advanced Settings"
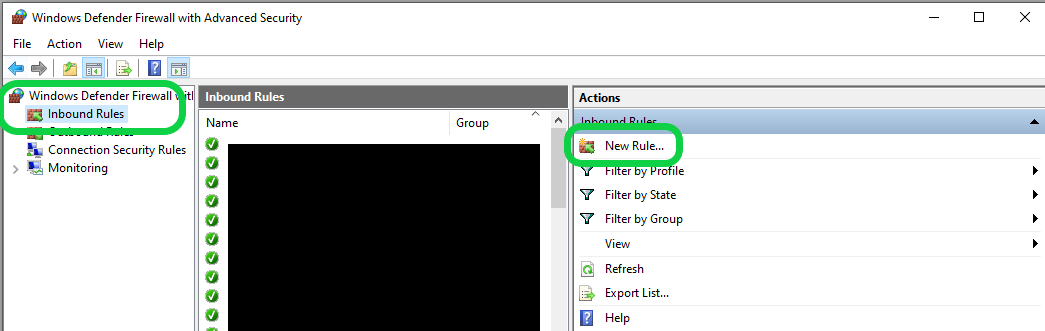
- IMPORTANT: The following steps will need to be performed twice, once for the SQL Server service and once for the SQL Server Browser service
- Click on "Inbound Rules" then click "New Rule..."
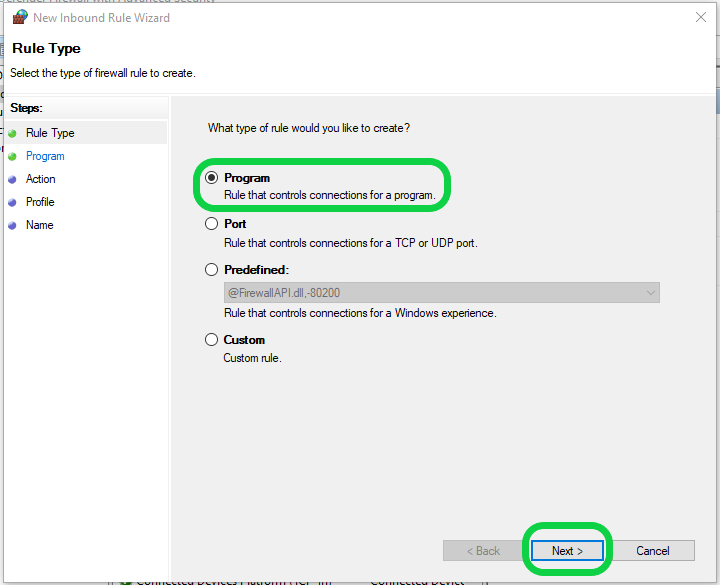
- Choose "Program", click "Next"
- Enter the file path for SQL Server or SQL Server Browser then click "Next".
- IMPORTANT: A separate rule will be created for each service, do not enter both file paths. File paths can be found by going to the appropriate services properties and are listed below for SQL Server 2017
- SQL Server 2017 file path: C:\Program Files\Microsoft SQL Server\MSSQL14.PBI_MYOVISION\MSSQL\Binn\sqlservr.exe
- SQL Server Browser file path: C:\Program Files (x86)\Microsoft SQL Server\90\Shared\sqlbrowser.exe
- Ensure "Allow the connection" is chosen, click "Next"
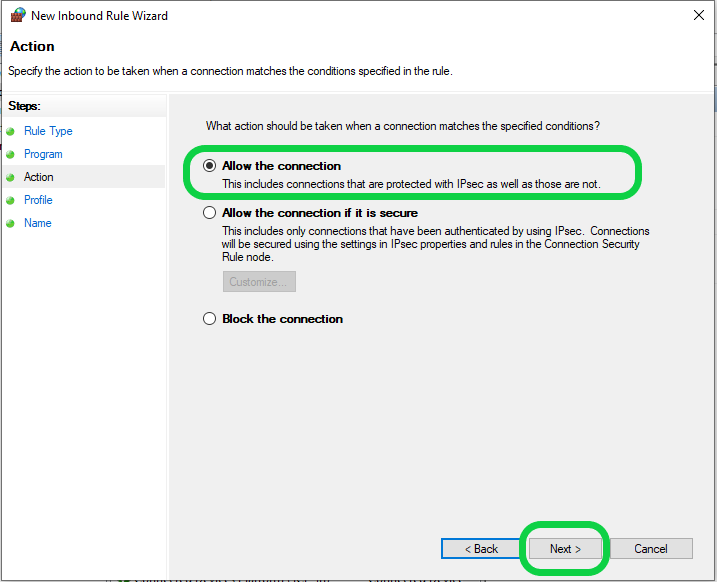
- Click "Next"
- Enter the appropriate name, then click "Finish"
- "MyoVision SQL Server" for the SQL Server service file path
- "SQL Server Browser" for the SQL Server Browser service file path

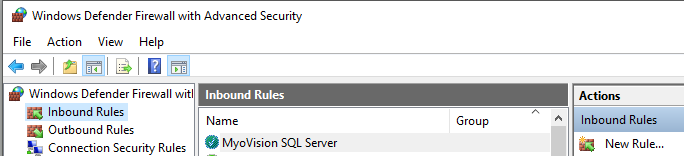
- The new Windows Defender Firewall Inbound Rule will appear at the top of the list
- Click HERE if you still need to add the second Inbound Rule, otherwise move to Step 4
- Click on "Inbound Rules" then click "New Rule..."


4. Install the MyoVision software on the "client" computer(s)
- If the MyoVision software is not installed already or is not running the current version follow the instructions in Install the MyoVision Software
- Not sure if you are running the current version? See our support article How Do I Check My Software Version?
- SQL Server is only necessary on the "server" computer
5. Configure "client" computer to look for the network database
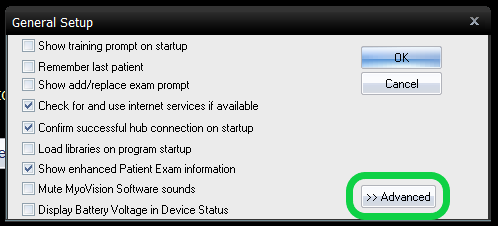
- Set the MyoVision software to "Remote Data" under General Settings
- Setup > Settings > General
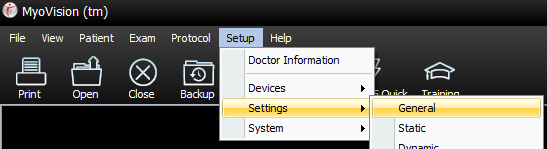
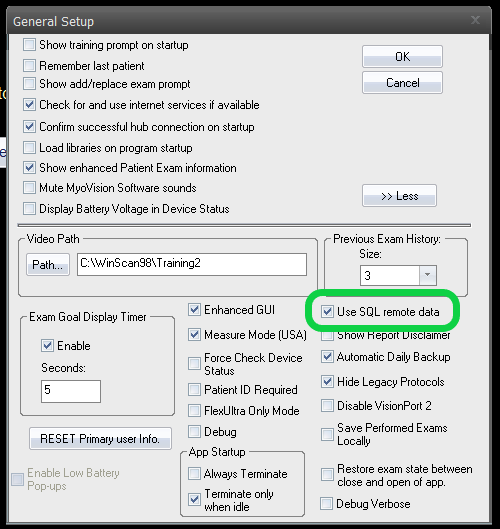
- Click "Advanced"
- Check box next to "Use SQL remote data", then click "OK"
- Setup > Settings > General
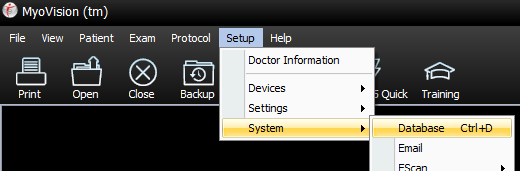
- Connect to the "server" computer network database
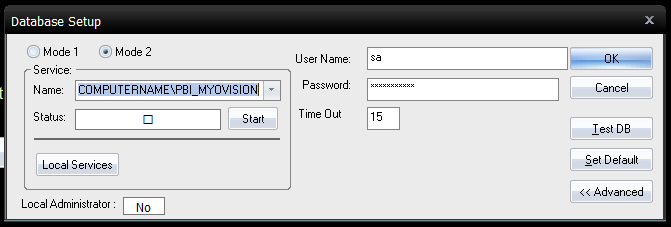
- Setup > System > Database (or use hotkeys Ctrl+D)
- Delete "(local)" and enter the "server" computer PC Name
- Not sure what the "server" computer name is?
- On the server computer, click the windows icon then type in "name"
- Click on "View your PC name"
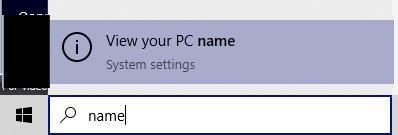
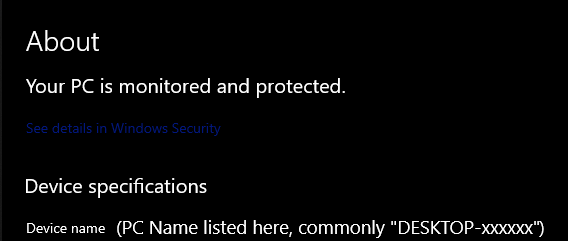
- Not sure what the "server" computer name is?
- The "Name" field should show as below where "COMPUTERNAME" is replaced by the "server" PC name found above
- Advanced users only: If the "server" has a static IP address, the IP address of the "server" can be used instead
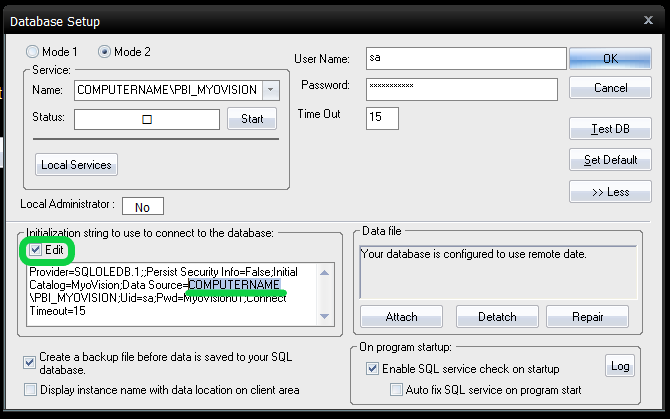
- IMPORTANT: Some computer names are too long for the "Name" field, in that case click on "Advanced" then check the box next to "Edit" and enter the PC name in the appropriate location. (Example highlighted below)
- Advanced users only: If the "server" has a static IP address, the IP address of the "server" can be used instead
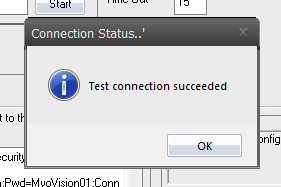
- Test the database connection
- Click "Test DB"
- If the network database setup is successful, there will be a "Test connection succeeded" message.
- If you have multiple "client" computers, configuring MyoVision software will be required for each computer.
- If you have multiple "client" computers, configuring MyoVision software will be required for each computer.
- If the network database setup is not successful or if there are other network issues, there will be a "SQL ERROR" message.
- NOTE: It can take some time for the network to find the correct location, if the test connection does not succeed on the first test, wait 2 minutes then test again.
- Still having issues? See our support article Resolving SQL Errors On a Network Database or call MyoVision Technical Support at 1-800-969-6961 opt 2 (International: 206-448-3464 opt 2)
- Setup > System > Database (or use hotkeys Ctrl+D)


