Summary
This document shows you how to export patient exams as files. Options for export are; Single Patient and/or Exam, Multiple Patients, or the Entire Database.
Need to Import files? See our support article How to Import Patient Files
Before you Begin
- IMPORTANT: Create a new folder to save the exported exam files
- We recommend the Desktop or Documents folder
- Not sure how to create a new folder? Click HERE for instructions.
- Make sure you have the latest version of the MyoVision software. Download here: https://www.myovision.com/download.html
How to Export Patient Files
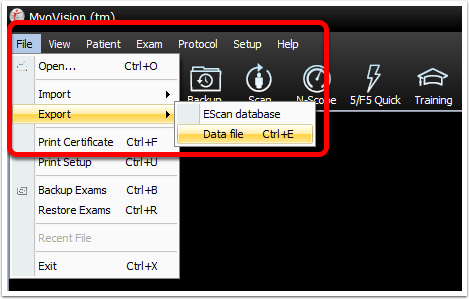
1. Navigate to the Data File Export screen
- Click on the drop-down menu "File"
- Choose "Export" then "Data File"
- You can also press the control key and E on your keyboard at the same time
- You can also press the control key and E on your keyboard at the same time

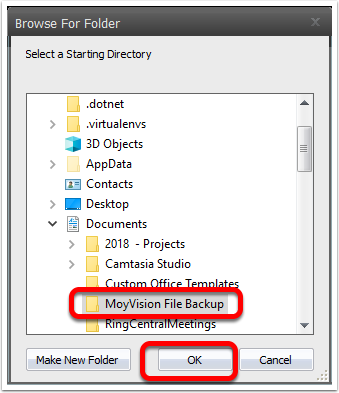
2. Choose the Export Folder
- Click on the button in the bottom left corner "..."

- Select the location where you want the data exported to, this would be the folder created during "Before you Begin". Then click "Ok"


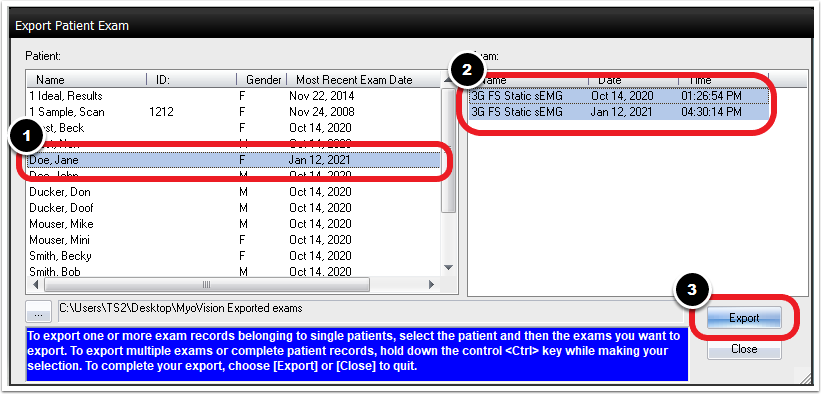
3. Choose between Single Patient and/or Exam, Multiple Patients, or Entire Database Export
Single Patient and/or Exam Export
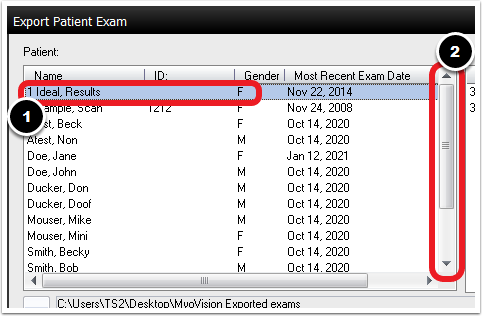
- Click on the patient name
- Click on the exam to export, if you want multiple exams press and hold the Control key on your keyboard while clicking the exams you want to export
- Once all desired exams are highlighted click Export
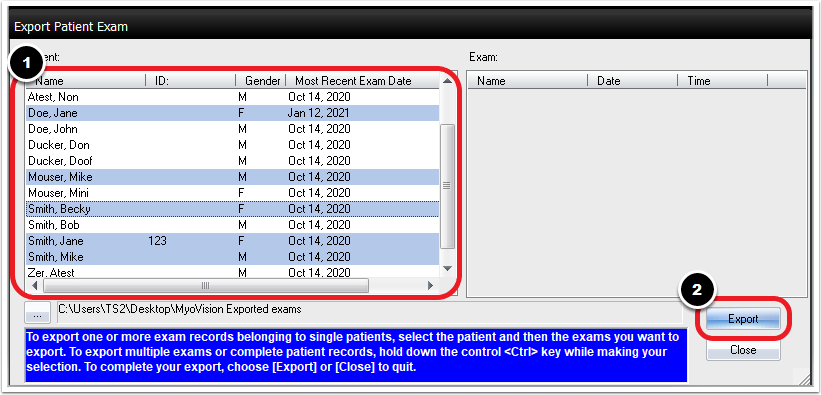
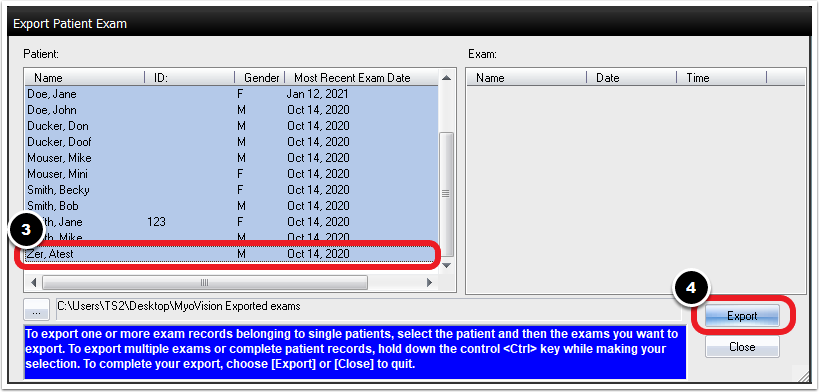
Multiple Patient Export
- NOTE: Exporting multiple patients will export all exams for each patient
- Press and hold the Control key on your keyboard then select each patient you want to export
- It is possible to sort by any column, click on the top of column to sort by (i.e. Most Recent Exam Date)
- Once all patients are highlighted, click "Export"
Entire Database Export
- Click on the first patient name on the list
- Use the scroll bar to scroll to the bottom of the patient list
- Press and hold the Shift key on your keyboard and click on the last patient name
- Once all Patients are highlighted click "Export"


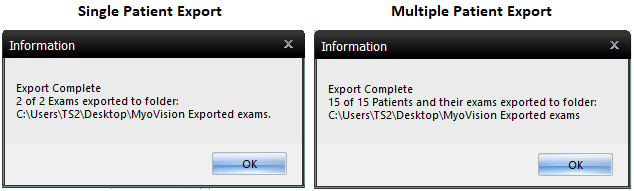
4. Confirm Successful Export
- Software will confirm when the export is complete and the file location
- NOTE: The number of exams exported will reflect how many exams were chosen for export
- NOTE: The number of exams exported will reflect how many exams were chosen for export
