Summary
This document will show you how to bind devices to a PhysioMonitor. This should only apply to devices that have not been previously bound to the PhysioMonitor. If it has been connected before, see our support article about troubleshooting connection issues to the PhysioMonitor.
Before you Begin
- Make sure you have the latest version of the MyoVision software. Download here: https://www.myovision.com/download
- Make sure that the PhysioMonitor is securely plugged into the computer and the outlet, and is away from any screen/TV/Monitor
- The PhysioMonitor should display a green "Computer Connect" light and a green "Power" light
- If the Power light is not on, check the connection to the wall power outlet or try a different power outlet
- If the Computer Connect light is not on, 1) check the USB cable connection to the computer, 2) try a different USB port on the computer or 3) try a different cable (printers often use the same cables).
- Have a paperclip or pushpin on hand for the binding process
- Open the MyoVision Software
How to Bind Devices to the PhysioMonitor
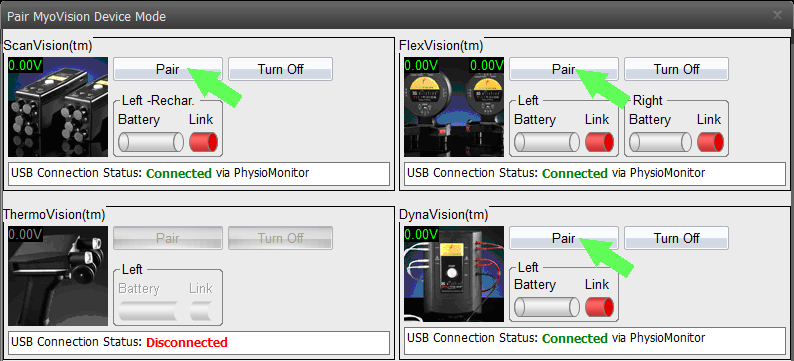
1. Open the 3G and 4G Pair Screen
- Go to the menu Help > Pair Device > 3G and 4G or press Control + 3 on your keyboard

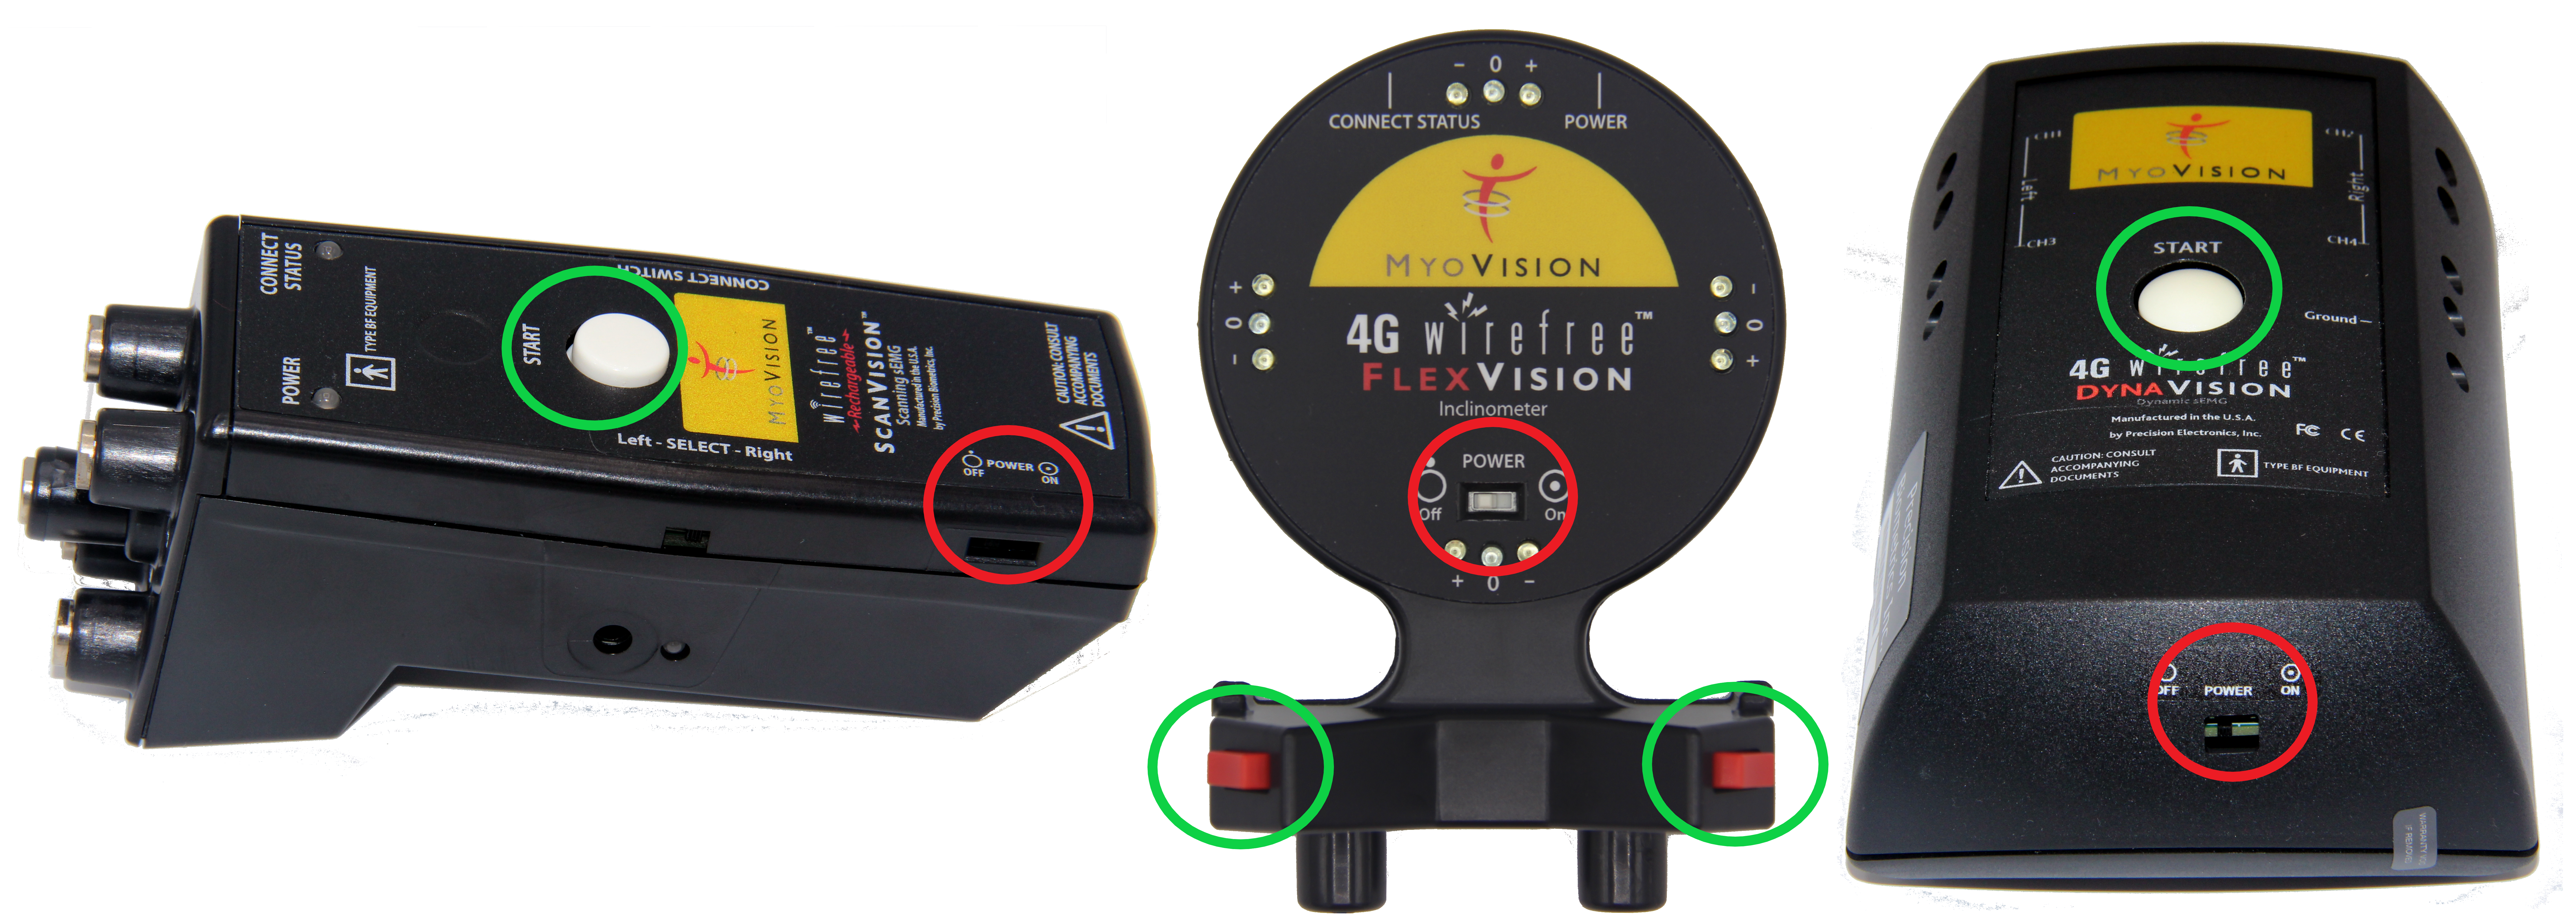
2. Press the Start Button on the device
- Power light should be green
- If it is red then put new batteries in the device or plug in and charge it
- Connection Status light should blink Red
- If the Connection Status light is green but it is not showing in the Pair MyoVision Device Mode Screen (see above) then go to this article to troubleshoot (One device does not appear bound even though the Connect Status light is green)
- If no lights turn on
- Check to make sure Travel (power) switch is turned on (to the right) and it has batteries or is charged

3. Locate the Connect Switch
- Locate the button that says “Connect Switch.”
- ScanVision - The "Connect Switch" is located to the right of the start button
- FlexVision - The "Connect Switch" is located at the top of the dome
- ThermoVision - The "Connect Switch" is located on the base
- DynaVision - The "Connect Switch" is located on the top
***The next few steps are time sensitive. Read through the next steps before you proceed. Once you push the connect switch button on the device, you will only have a few seconds to press the bind button in the MyoVision software***

4. Preparing Device to Bind
- Push and hold the recessed "Connect Switch" button on the device until the blinking red light turns into a solid red light
- Use a straightened paper clip or push pin. Do not use a pencil as it may break inside the enclosure
Note: If you have a second device, finish the binding process for one unit before proceeding to the second.
5. Binding to PhysioMonitor
- Click on the Pair (Bind) button next to the appropriate device on the "Device Mode" Screen
- This must be done while the "Connection Status" light is a solid red
- If it does not connect the first time try again; timing is very important
Note: Make sure to hit the correct Bind button next to the correct device you have in your hand.

6. Successful binding
- If successful:
- "Connect Status" Light on Device is Green
- "Link" bar on the screen is Green
- "Battery" status is displayed
- If not successful:
- Try steps 4-5 again; timing is very important and it may take a few tries
Repeat steps 3-5 for all devices.
Reminders:
The timing of the binding process is crucial. If the handheld device goes back to a blinking red light before you hit the “Bind” button, you will need to try again.
If you need further assistance, please email support@myovision.com with your contact information and a few sentences describing the issue. You can also call 1-800-969-6961, option 2 for Technical Support.
Do both of your devices have a Green "Connect Status" light, but one is not appearing bound on the screen? See this support article for help One device does not appear bound even though the Connect Status light is green

