Summary
This document shows you how to set up EScan with an Exchange Server
Before you Begin
- If you have an IT department that set up your Exchange account, be ready to contact them as they will have the information needed for step 3.
- Note that other types of email are simpler to set up to work with EScan. However, if an Exchange account is the only available account, feel free to contact our technical support team (for contact info, see bottom of article).
How to Set Up EScan to Work with Microsoft Exchange
1. Open EScan's Email Settings
- Go to Setup > System > Email

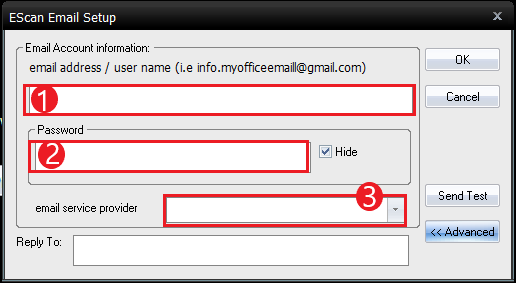
2. Enter Email Information
- Enter email and password in sections 1 and 2. Leave section 3 blank. Click Advanced
3. Get SMTP Email Settings
- Contact your system administrator or IT personnel to obtain the following information about your email.
- SMTP Outgoing
- Server Address or Host Name
- Login Method
- Port number.
- Enable/Disable SSL/TLS Encryption
- SMTP Outgoing
If your exchange email is currently set-up to be used with Outlook, use the information in this related Microsoft Support Article to find the information linked above.
4. Enter Advanced Settings
- In the window shown below, enter the SMTP Email settings in their respective boxes, then click Create
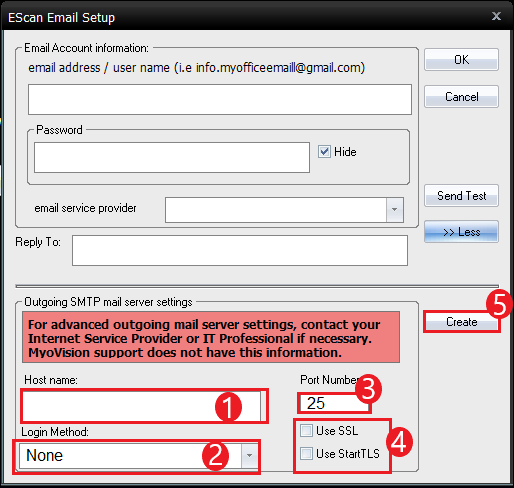
- Enter the Host name (SMTP [outgoing] Server Address).
- Select the Login Method.
- If needed change the outbound port number.
- Enable/Disable SSL/TLS Encryption.
5. Send Test Email
- Refer to the main Setting Up EScan article and skip to Step 4 for sending a test email and finalization.
Note: If you need help at any point, please reach out to our technical support team at 1-800-969-6961, option 2. (International: 206-448-3464) Office hours are 8:00am - 4:00pm M-F, PST.