Table of Contents:
Summary:
This article will show you how to import screenshots of a DynaROM exam into the interpretation report.
Install and Setup:
In the first set steps we will be downloading the Greenshot software and set it up to be used for capturing images for your interpretation reports.
Download and Install
To download the Greenshot install file visit getgreenshot.org/downloads/ and select the Download latest Stable Release for Windows option.
- Once the download has finished run the installer.
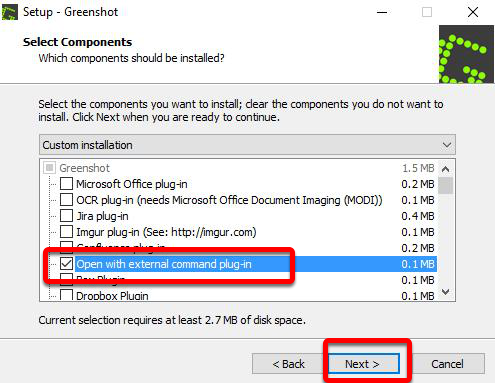
- Click Next to proceed through the installer until you get to Select Components. Select the Open with External Command plugin. and click Next.
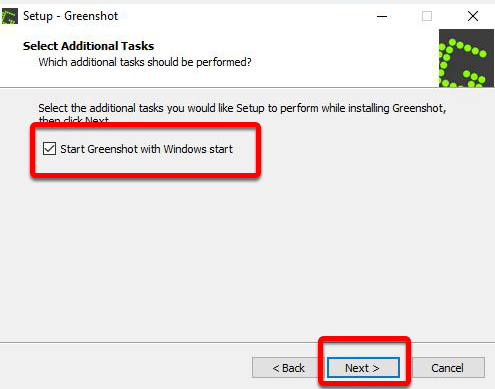
- Check the box next to Start Greenshot with Windows Start and click Next then finally Install.


Once the software has been installed you will want to set the Preferences properly.
Setup Preferences
In this step we will be setting the preferences for your Greenshot software.
- Open the System Tray.
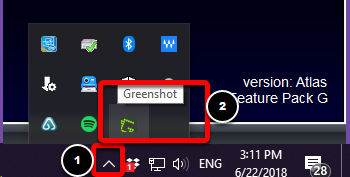
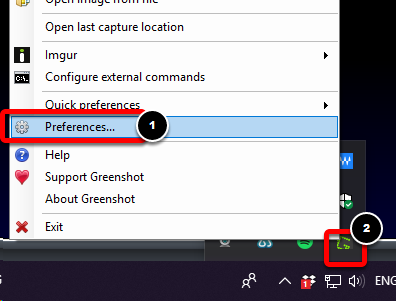
- Right-click the Greenshot icon and select the Preferences option.
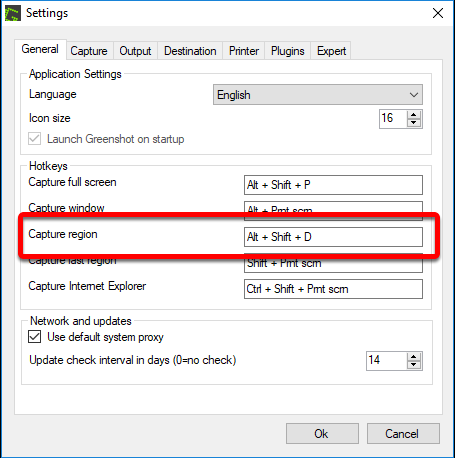
- The Capture Region feature is what will allow you to easily import exam images into your interpretation reports. The Capture Region hotkey allows you to quickly activate the Capture Region feature by pushing a key or key combination on the keyboard. You can set this hotkey to a different key or key combination by clicking in the text box then pressing the key you want to set to be the hotkey.
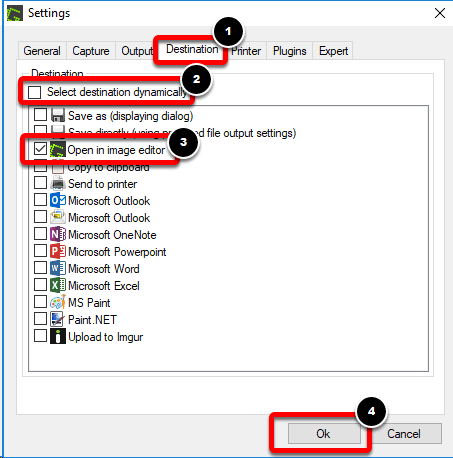
- Next click the Destination tab. Then click to remove the check mark in the checkbox for Set destination dynamically. Then click to place a check mark in the Open in Image editor option.


Create Report and Import Images
Now that Greenshot has been installed and setup you are ready to create your report and begin importing images.
Create Report:
Once the software has been downloaded and setup you are ready to start importing images into your interpretation reports.
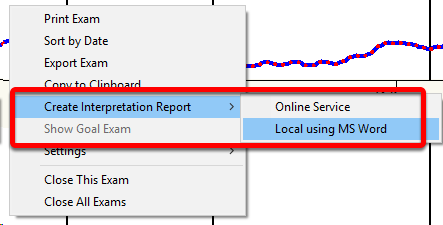
- Right-click an open exam, go down to Interpretation Report and choose the Local using MS Word option.
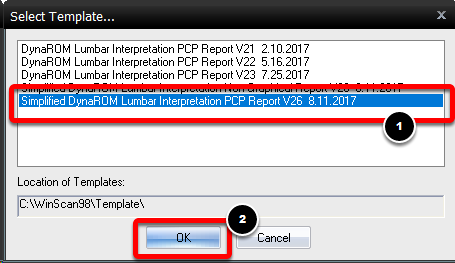
- Select the "Simplified DynaROM ... PCP Report" when asked to select which template to use. Then, click OK.
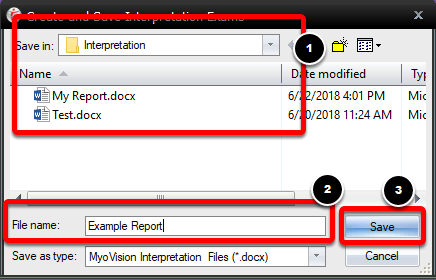
- On the next screen select where you want to save the report, enter your desired name for the report *.doc file, then click Save.
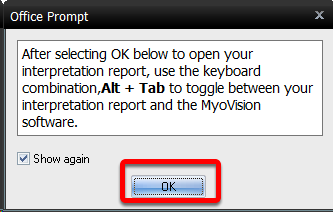
- When the prompt appears click OK. The software should generate the report and open it in word.


You are now ready to import images from the MyoVision software into your interpretation report.
If you are experiencing issue creating an interpretation report Click Here for a troubleshooting guide interpretation reports.
Import Images Using Greenshot
Make sure you switch to the Interpretation Report Word document before continuing.
- Fill out the report as you normally would and pause when you get to the image portion.
- Switch back to the MyoVision software and select the motion that corresponds to the image in the report you want to import. Then, use your Greenshot Hotkeys (default key: PrintScreen) to capture your patient's results.
Click and drag to select the area you want to import.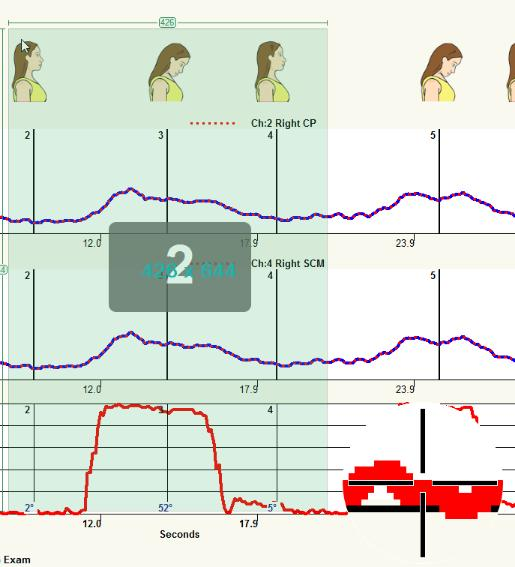
- After you've captured the image you want to import, the image will open in the Greenshot Image Editor.
You can use the tools on the left toolbar to highlight specific areas or differences.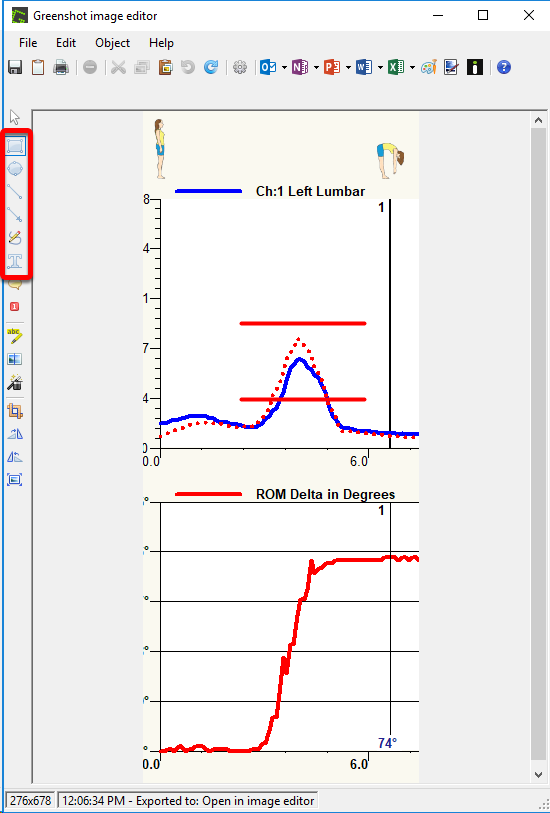
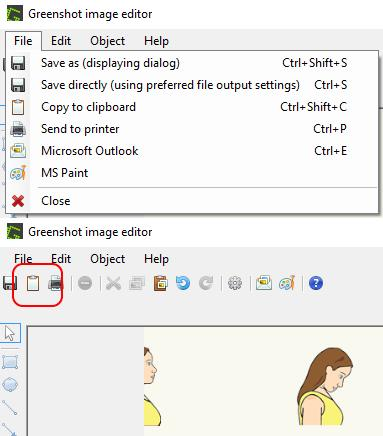
- The next step is to copy the image to the clipboard. To do that. you can click the clipboard icon, open the File menu and select Copy to Clipboard, or push the Ctrl, Shift, and C keys on the keyboard at the same time.
- Click back to the interpretation report word file.
Right-click in the box, that you want to import the into, and select Paste. You can adjust the size of the image to fit the box by click and dragging on the edges.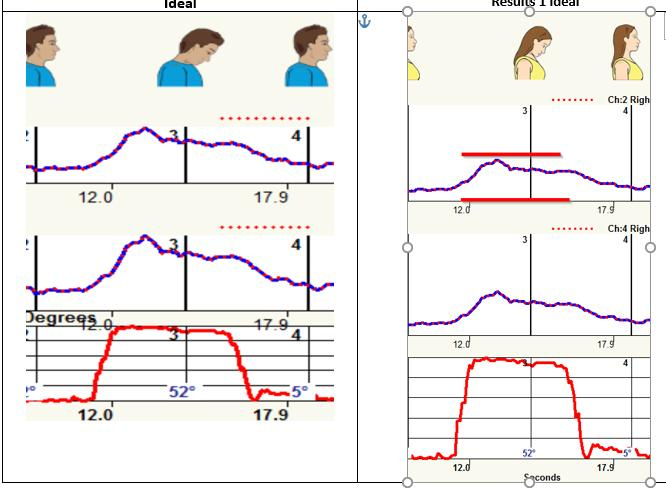


Repeat the above steps for each motion.
