Summary
This document instructs you on how to install SQL 2017.
Table of Contents
Before you Begin
- If you have already installed the MyoVision software, then received an SQL 10 error, see our support article SQL Error code 10 - Service not running on New MyoVision software installation
- Make sure the Windows account you are logged into has Administrator privileges
- Check Administrator Privileges if you are unsure.
- IMPORTANT: Make sure Windows is fully updated before installing MyoVision.
- To check if you are fully updated, go to the Microsoft support article here: https://support.microsoft.com/en-us/windows/install-windows-updates-3c5ae7fc-9fb6-9af1-1984-b5e0412c556a
- Download the latest MyoVision installer at https://www.myovision.com/download.html
- If you are running an older version of SQL Server and are trying to upgrade to SQL Server 2017, see our support article Upgrade to SQL Server 2017
How to Install SQL Server 2017
1. Run SQL Server Setup File
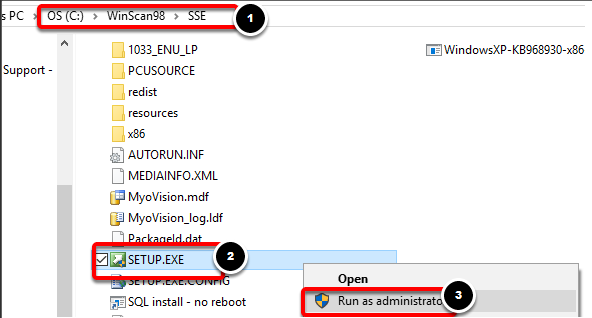
- Navigate to C:\WinScan98\SSE (Do not use SSE2014). Right-click on "SETUP.EXE" and select "Run as administrator"
- If you do not have the SSE Folder, update your software first
- Not sure how? See our support article Updating Your MyoVision Software
- Not sure how? See our support article Updating Your MyoVision Software
- If you do not have the SSE Folder, update your software first

2. Select Installation Type
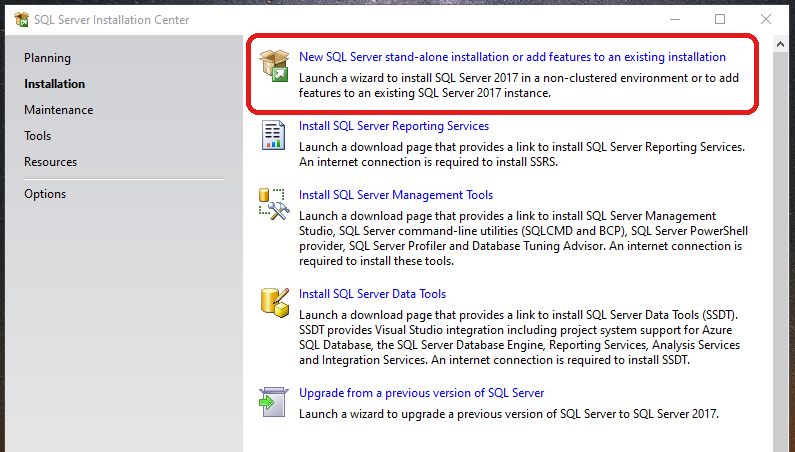
- Once the Installer opens, select the "New SQL Server stand-alone installation..." option
- NOTE: Make sure you are installing SQL 2017 and not SQL 2008. If the installer window says SQL 2008, rename the SSE folder to SSE2008, then download and run the MyoVision installer to install the proper SQL Setup files.

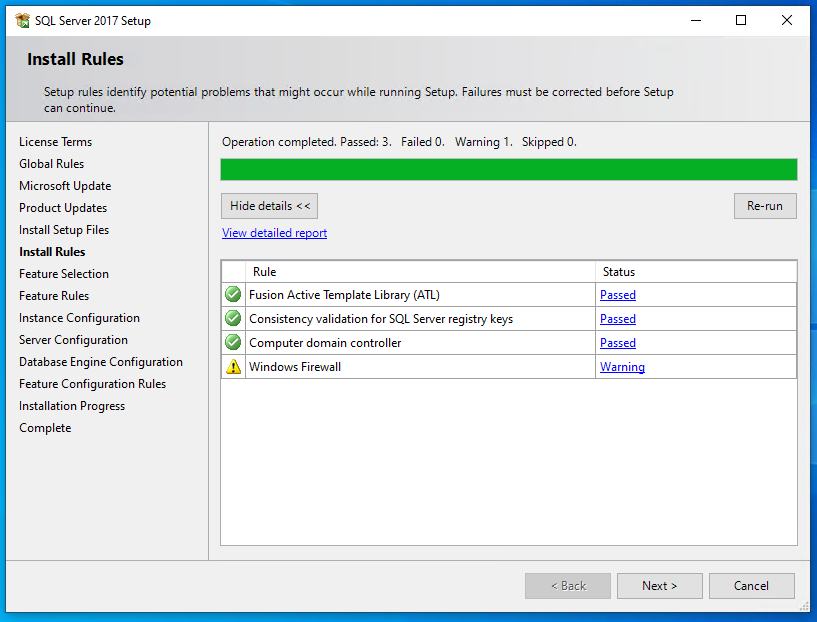
3. Click Next Through the Following Screens
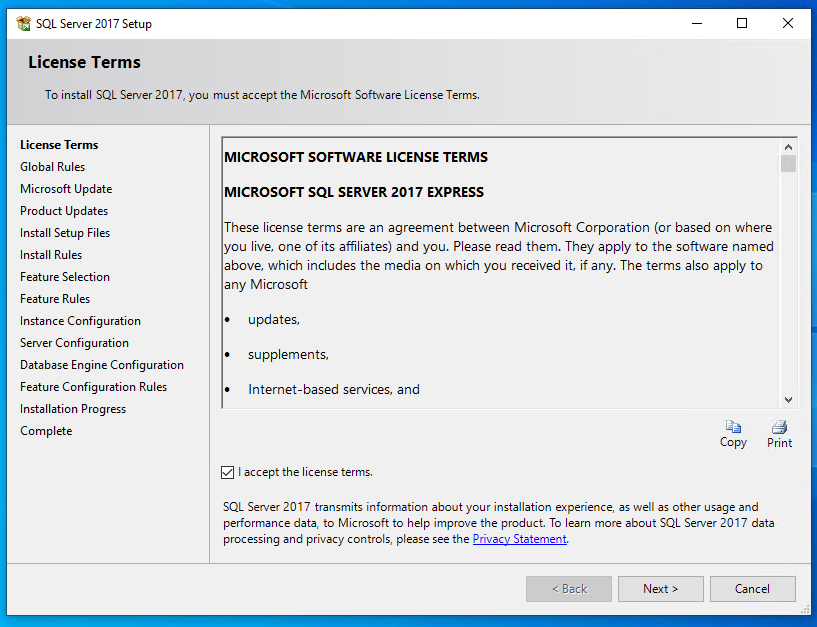
- Check the box next to "I accept the license terms." and click Next

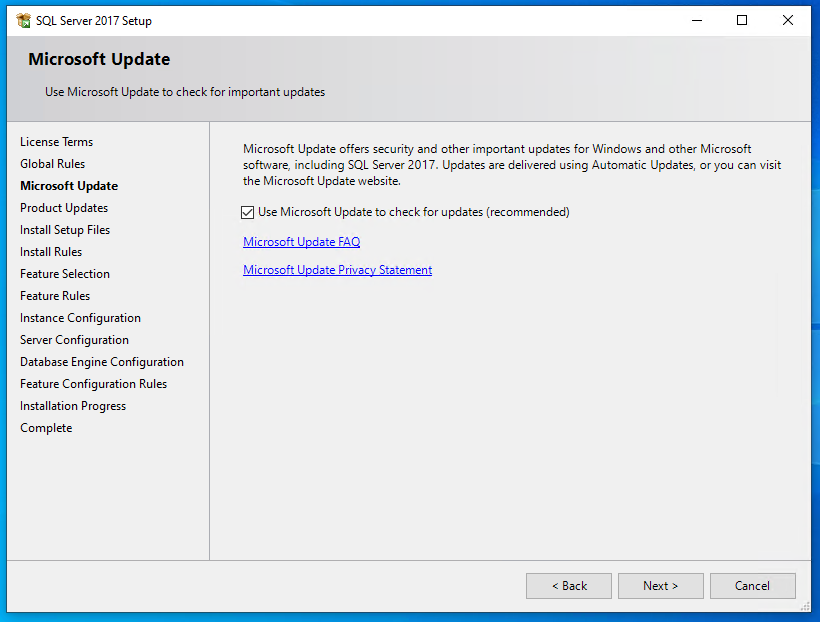
- Check the "Use Microsoft Update..." box and click "Next"

- "Windows Firewall" will likely give a warning, but it's expected - click "Next"

4. Feature Selection
- Click "Select All" then click "Next"


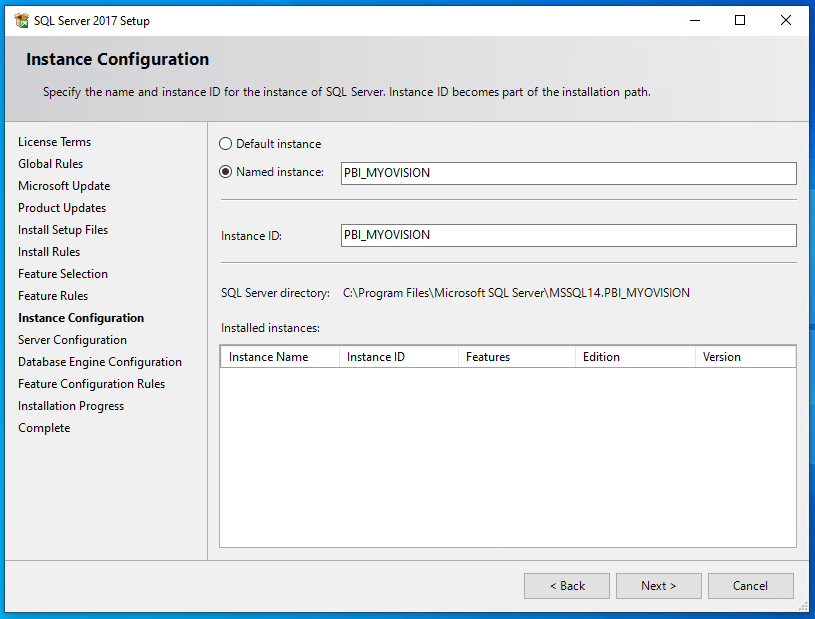
5. Instance Configuration
- Change "Named instance" to PBI_MYOVISION
- Important: The named instance must read exactly as shown, and the "Instance ID" should match after clicking out of the "Named Instance" text field
- Click "Next"

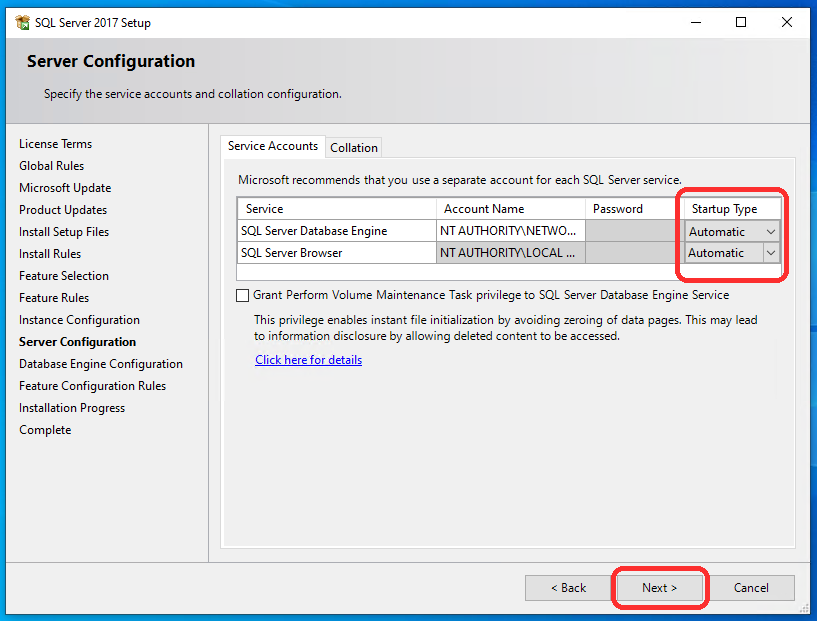
6. Server Configuration
- Make sure "Startup Type" is set to "Automatic" for both Services

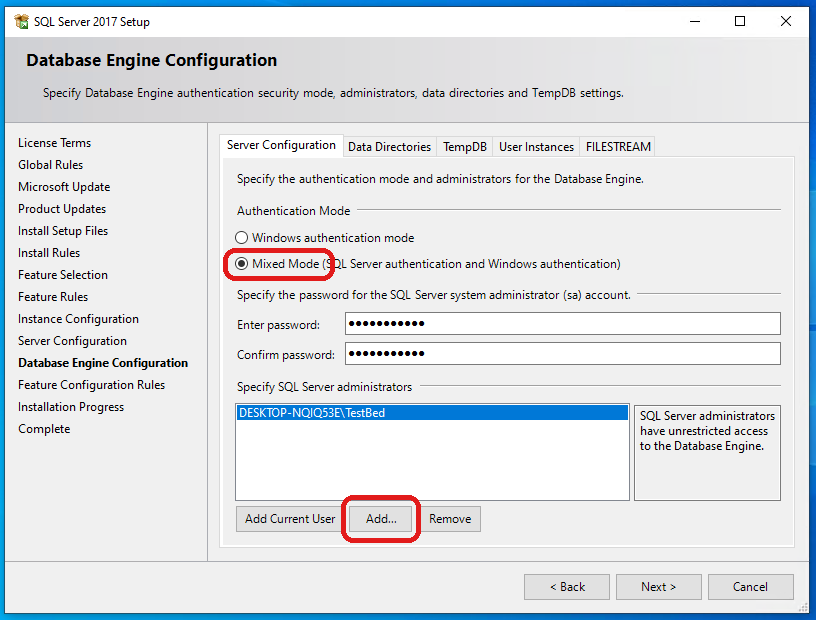
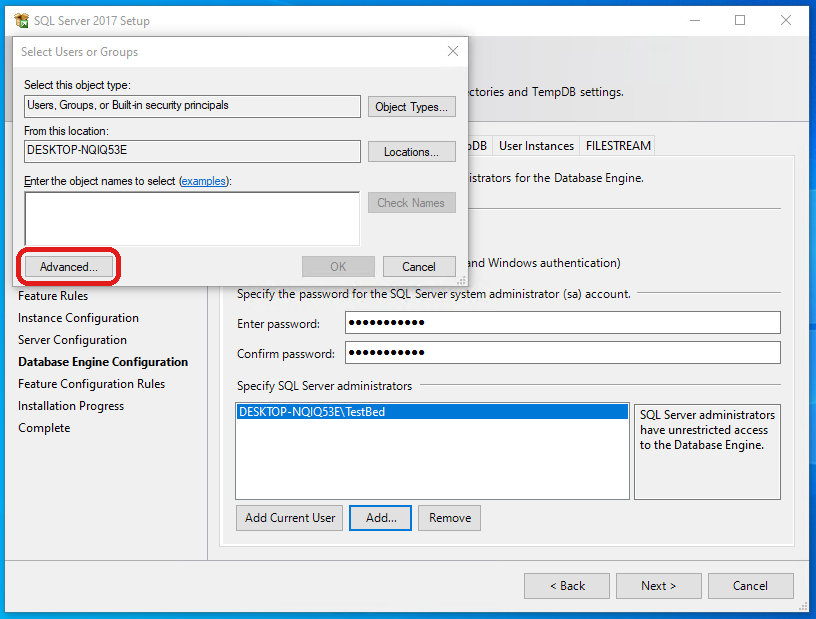
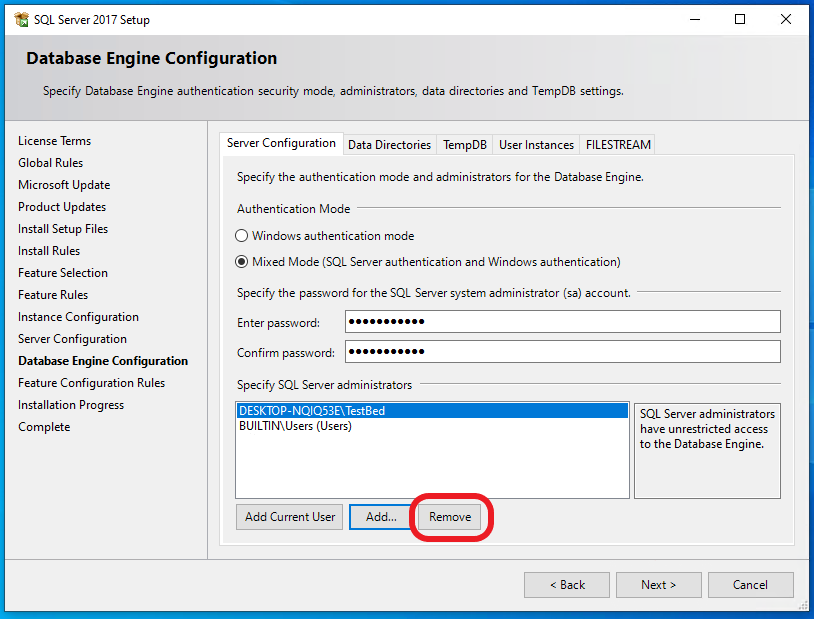
7. Database Engine Configuration
- Select "Mixed Mode" for Authentication Mode.
- Set the password to MyoVision01 for both fields. Be careful typing/pasting the password into this field. There is no way to change it after installing
- Then click "Add"
- The following screen will pop up. Then click "Advanced"
- Click "Find Now"
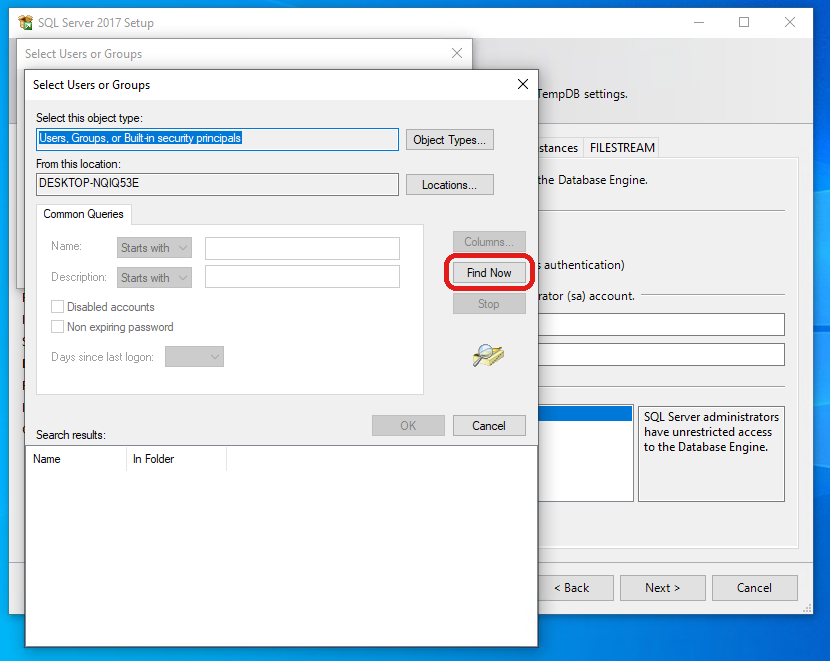
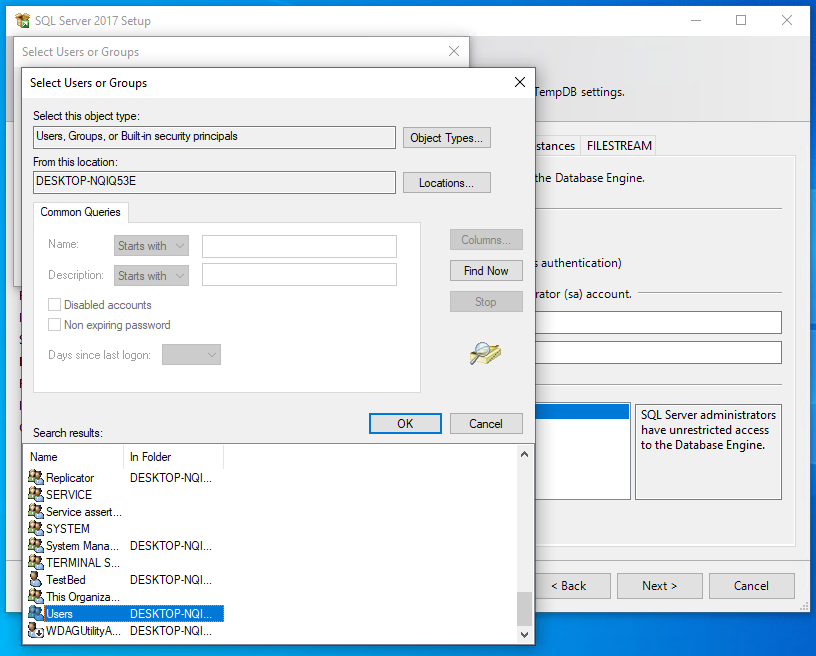
- Click on any name in the search results and quickly type "Users" and select that result. Then click "OK"
- Note: If a "Users" account does not exist, look for Domain Users or other group that ends in Users
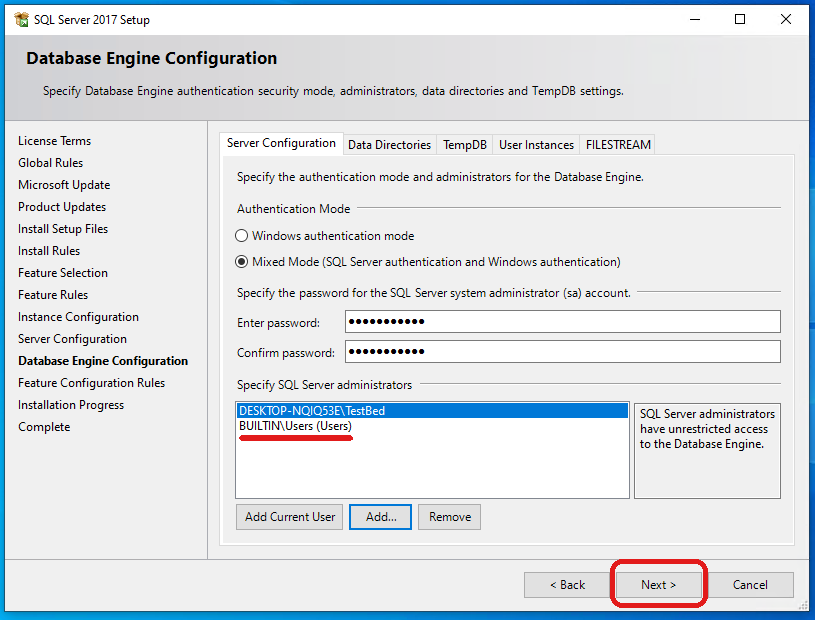
- Click "OK" on both "Select Users or Groups" windows. Once you're back to the installer, make sure the Users account is added before clicking "Next". It may take a moment to add and the name may be different if a Domain User or other group user account was added.


IMPORTANT (ONLY IF ERROR MESSAGE BELOW APPEARS, Otherwise skip to step 8):
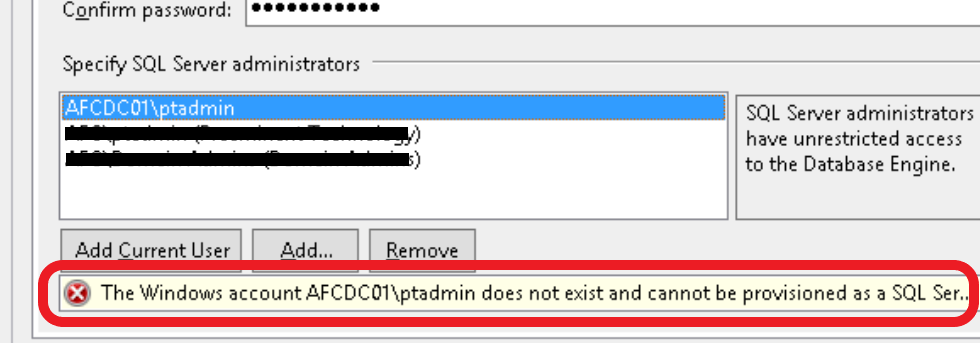
Some user accounts are not considered valid by SQL Server, if an error message appears that the user account is not valid when clicking "Next" then follow instructions to remove the current user account. .
- Select the user account
- Click "Remove"
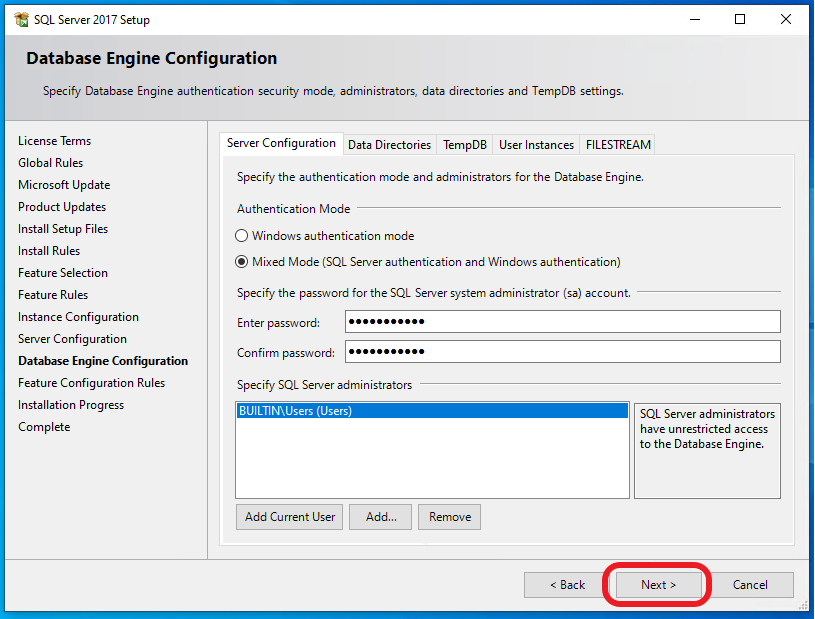
- The only account left should be the user account added (Example: BUILTIN\USER)
- Click "Next"


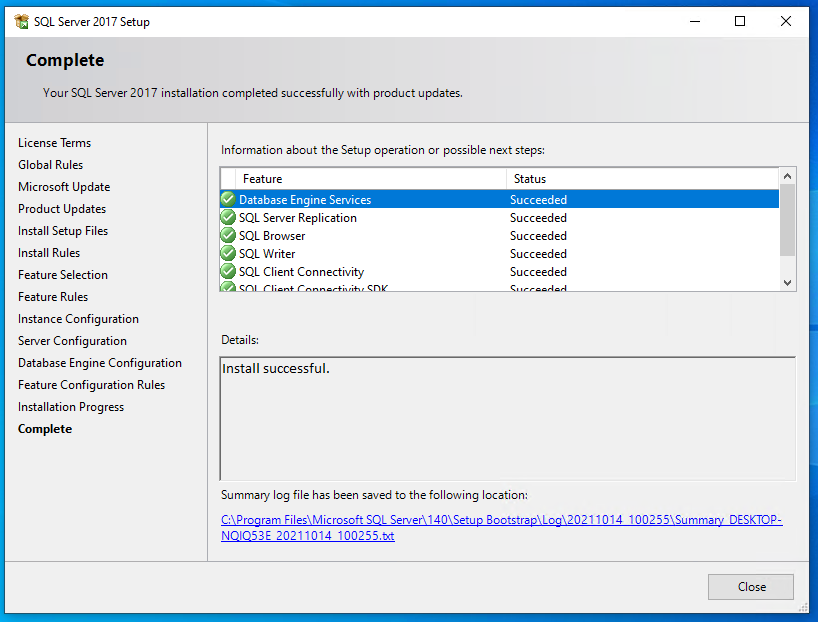
8. Complete
- You should have all green check marks on this screen. Click "Close"

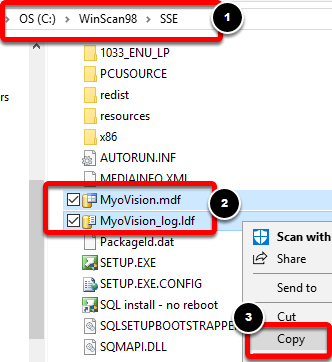
9. Move the Default Database Files
- Navigate to C:\Winscan98\SSE\. Hold down the Control (Ctrl) on the keyboard and left click both the MyoVision and MyoVision_log files to highlight. Right-click and select Copy.
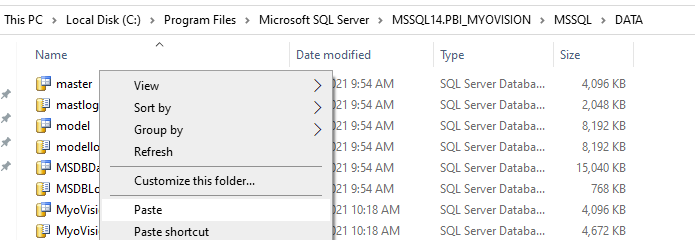
- Navigate to C:\ProgramFiles\Microsoft SQL Server\MSSQL14.PBI_MYOVISION\MSSQL\DATA
- Right-click in the DATA folder and select Paste.


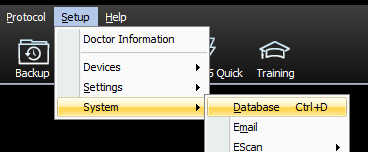
10. Attach the Data File in MyoVision
- Open the MyoVision software. Go to Setup -> System -> Database
- Click the "Advanced" then click the "Attach" button
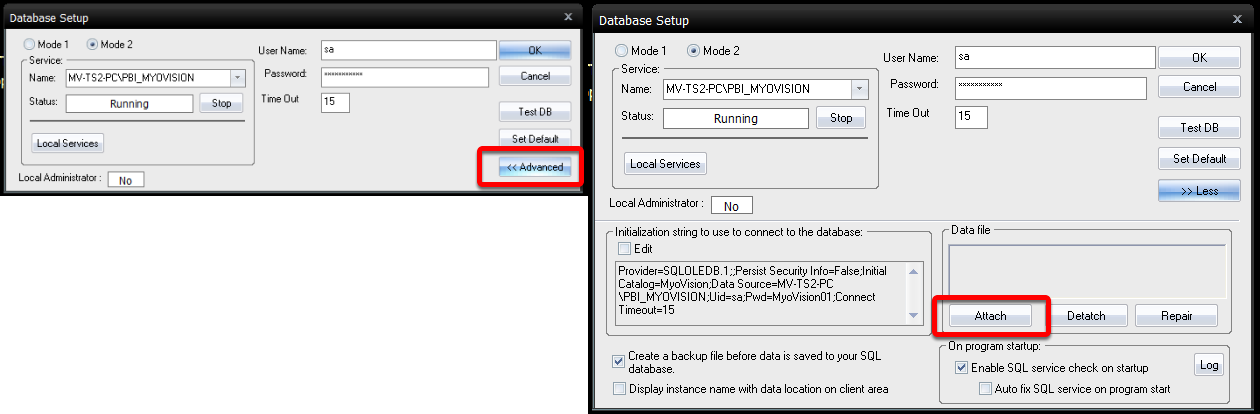
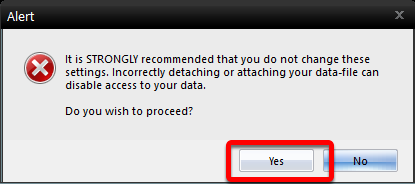
- When the alert pops up, select "Yes"
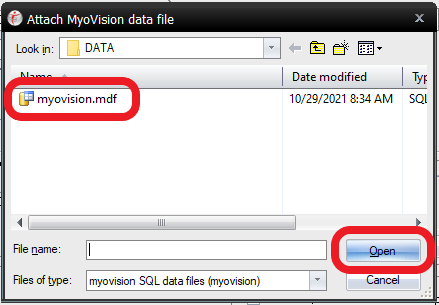
- Select the myovision or myovision.mdf file and click "Open"
- The software should tell you that the data file is attached and the database test succeeded


Need to setup MyoVision? See our helpful support articles below
- How Do I Enter my Software Registration Key?
- Configuring Your MyoVision Software for Single or Dual Scanners
- Setting Up Escan
- Customize the EScan Message
- How Do I Enter My Thermography Calibration Values?
- How Do I Set Up My Wired Thermography Devices?
- Configuring a Network Database in Your Office for MyoVision