Summary
This document will walk you through configuring MyoVision Escan to be used with Office 365.
Before you Begin
- Make sure you have the latest version of the MyoVision software and that it is registered.
- IMPORTANT: Feature Pack A or later is required for Escan to function
- How Do I Check My Software Version and Feature Pack?
- How Do I Enter my Software Registration Key?
How to Configure Office 365 to use with Escan
1. Login to Microsoft Admin Center
- Go to Admin.Microsoft.com
- Login using your Office 365 administrator account
- If you are redirected to the GoDaddy Admin Center,
- GoDaddy uses Office 365 but requires different setup due to being unable to access the Microsoft Admin Center. See our support article; Configuring GoDaddy to use with Escan.
- If you are redirected to the GoDaddy Admin Center,
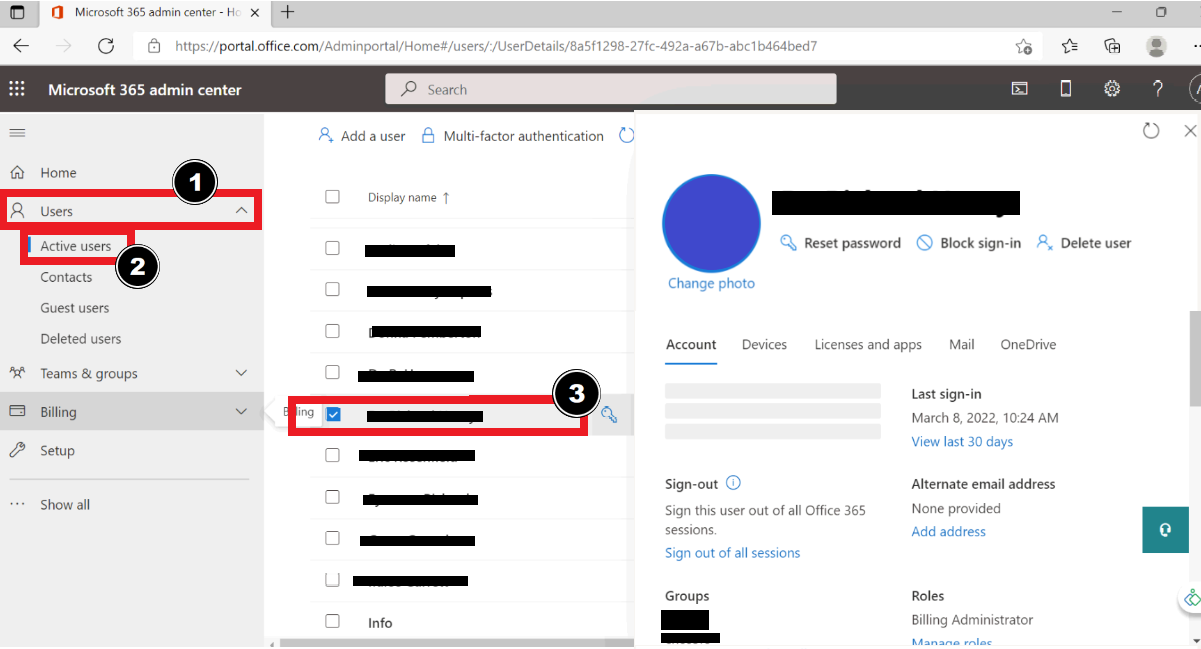
2. Open user information for the email address
- Users > Active users
- Click the email address that will be used for MyoVision. This will cause a window on the right to appear as shown below.
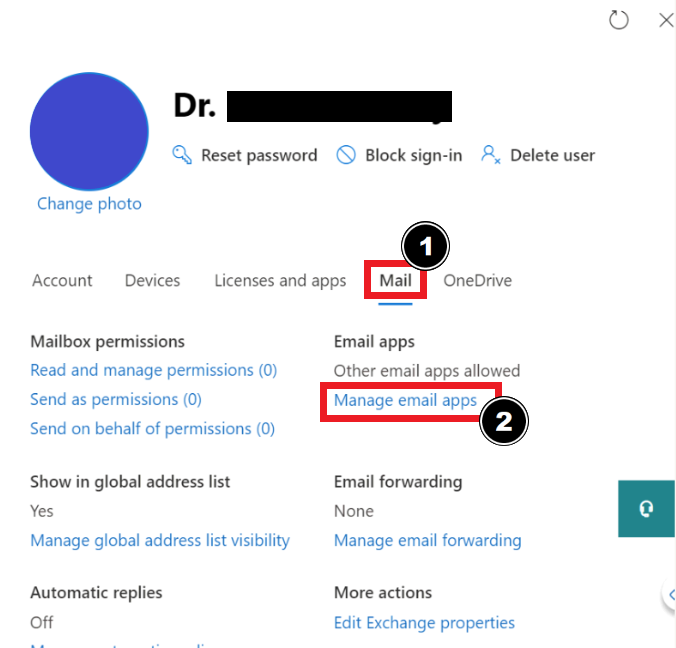
3. Open Manage Email Apps
- Mail > Manage Email Apps
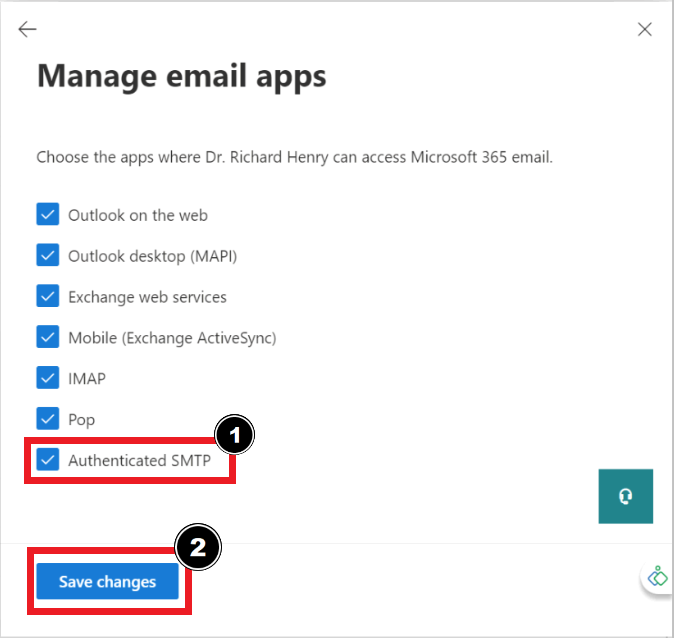
4. Turn on Authenticated SMTP
- Check the box next to "Authenticated SMTP"
- Click "Save Changes"
5. Open EScan's Email Settings in the MyoVision software
- Open the MyoVision software
- Go to Setup > System > Email

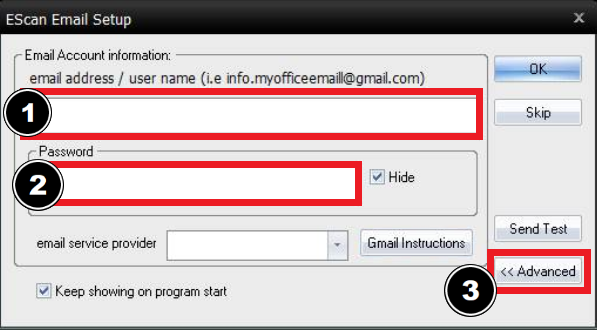
6. Enter Email Information
- Enter email and password in sections 1 and 2.
- Click Advanced.
7. Create new email service provider
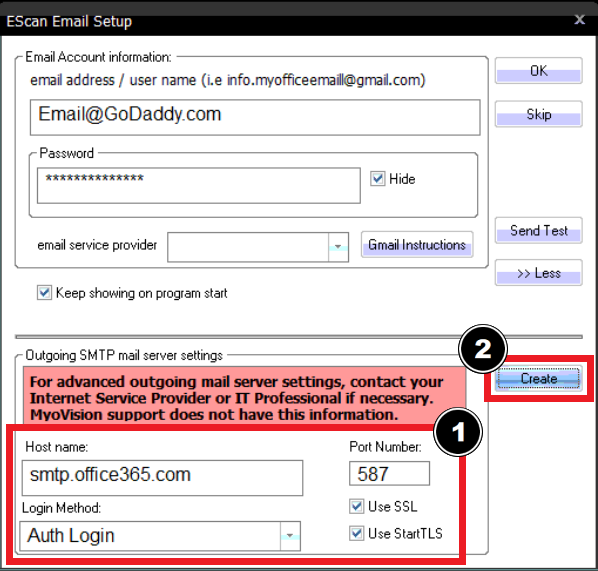
- In the window shown below, enter the following information
- Host Name: smtp.office365.com
- Port Number: 587
- Login Method: Auth Login
- Check both "Use SSL" and "Use StartTLS"
- Click "Create"
- Name the email service provider configuration in the "File Name" field then click "Save"
- Recommended file name: GoDaddy - Office365
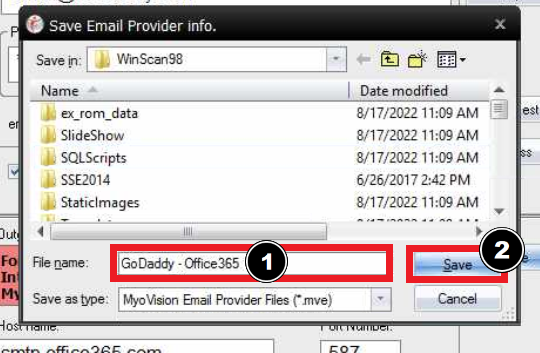
- Recommended file name: GoDaddy - Office365
8. Send Test Email
- Refer to the main Setting Up EScan article and skip to Step 4 for sending a test email and finalization.


