Summary
For Internal MyoVision use only.
This document will instruct you on configuring your FlexVision to Main or Aux. Only proceed with the steps in this article if you were instructed by MyoVision support.
Before you Begin
- All FlexVision systems are pre-configured for Dual or Single setups - new systems should not require any adjustment.
- Make sure you have the latest version of the MyoVision software. Download here: https://www.myovision.com/download
- Have a paperclip or something similar available if the Select Switch needs configuring
- Open the MyoVision software
How to Configure your FlexVision as Main or Aux Device
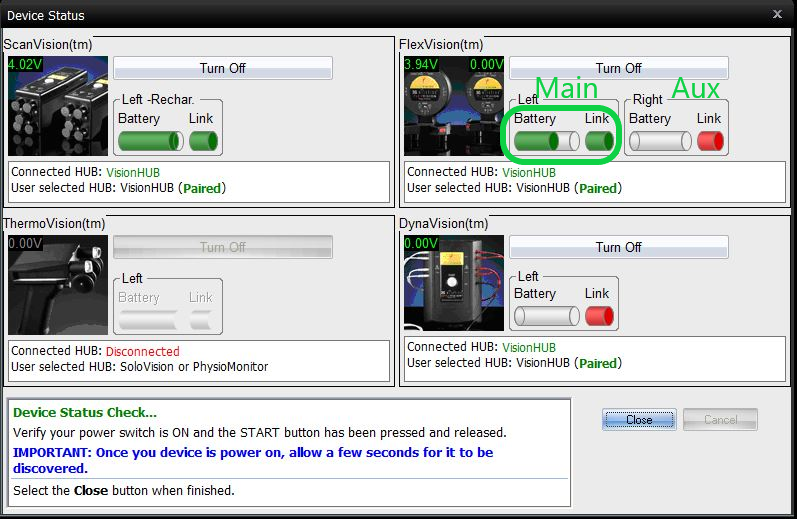
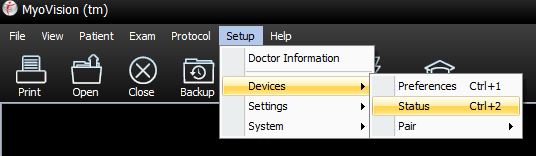
1. Open the Device Status Window
- Setup > Devices > Status (hotkey tip: press control + 2)

2. Locate the 'Select' switch
- Looking at the back label of the FlexVision, locate the 'Select Switch' labeling then look at the side of the device. If device was configured for customer use a black sticker may cover the switch location and will need to be removed.
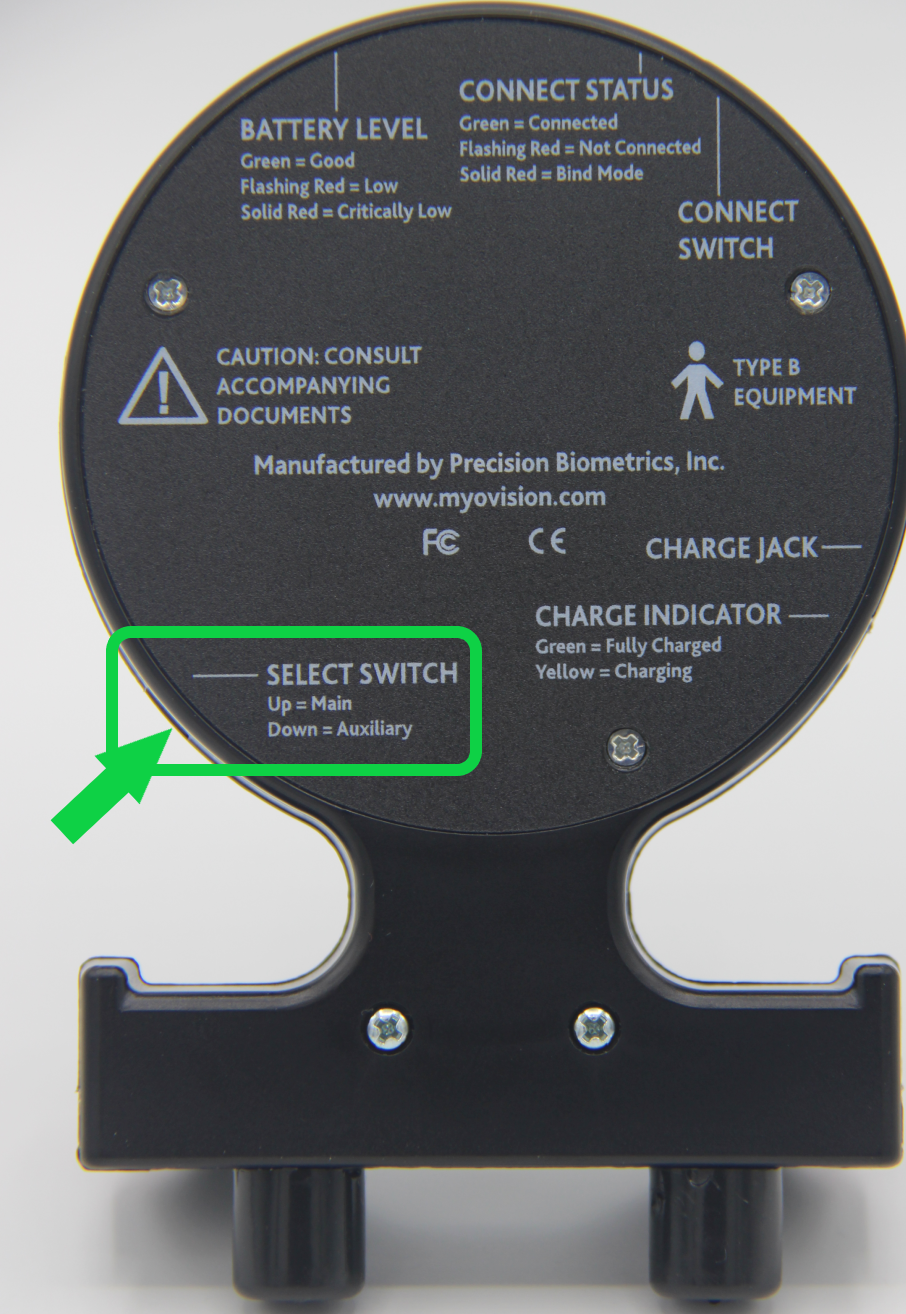

3. Check switch location
- If the switch is towards the top dome / battery level indicator LED (aka 'Up',) the device is configured for Main
- NOTE: Single FlexVision systems are only configured for Main.
- If the switch is pointing towards the rubber feet/bumpers (aka 'Down'), the device is configured for Aux
4. Use the paperclip or other tool to move the Select switch if required
- Main Configuration - Place the paperclip on the bottom (rubber feet) side of the select switch and move the switch up away from the rubber feet
- Important: If you are configuring for a Single FlexVision system, it must be configured as the Main Device
- Aux Configuration - Place the paperclip on the top (dome) side of the select switch and move the switch down towards the rubber feet
- Important: If you are configuring for a Dual FlexVision system, ensure one device is configured as Main and one device as Aux. Make sure the devices are properly labeled!
- While it does not matter in what hand the Main or Aux FlexVision is used in, the software will graphically track each device during Range of Motion testing so proper labeling will ensure there is not confusion due to what the software is showing vs what the customer thinks it should be if improperly labeled
- Important: If you are configuring for a Dual FlexVision system, ensure one device is configured as Main and one device as Aux. Make sure the devices are properly labeled!
- The example below shows a FlexVision configured for Main
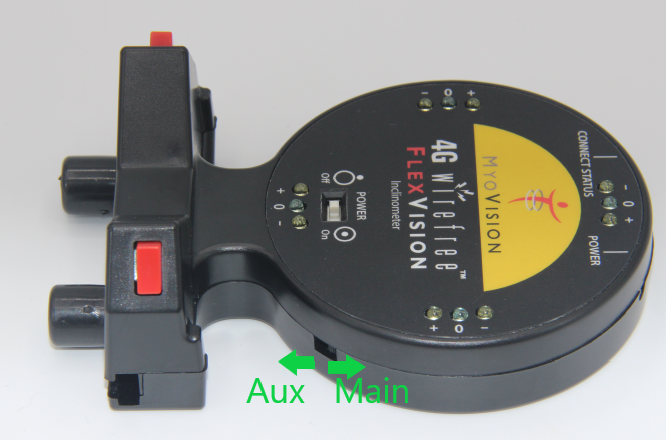

5. Power cycle the device
- Using the paperclip or similar tool, turn the FlexVision Travel/Power Switch to the OFF position, then back into the ON position. This is Required!
6. Confirm Configuration
- Press a Red Start Button to turn on the FlexVision and confirm the device shows properly in the Device Status Screen from Step 1
- Software uses slightly different language for devices 'handness',
- 'Left' is the 'Main' configured FlexVision
- 'Right' is the 'Auxiliary' configured FlexVision
- Software uses slightly different language for devices 'handness',
- Example below shows Main (aka Left) FlexVision connected to software