Summary
This document will instruct you on configuring your ScanVision to Left or Right. Only proceed with the steps in this article if you were instructed by MyoVision support or if 1) you are splitting your Dual ScanVision into two Single ScanVision systems which two System Hubs are required or 2) if the Left ScanVision device is not working and you need to configure your Right ScanVision to work alone.
Before you Begin
- All ScanVision systems are pre-configured for Dual or Single setups - new systems should not require any adjustment.
- Need to configure your software to work with one ScanVision? See our support article Configuring Your MyoVision Software for Single or Dual Scanners
- Make sure you have the latest version of the MyoVision software. Download here: https://www.myovision.com/download
- Have a paperclip or something similar available if the Select Switch needs configuring
- Open the MyoVision software
How to Configure your ScanVision for Left and/or Right Device
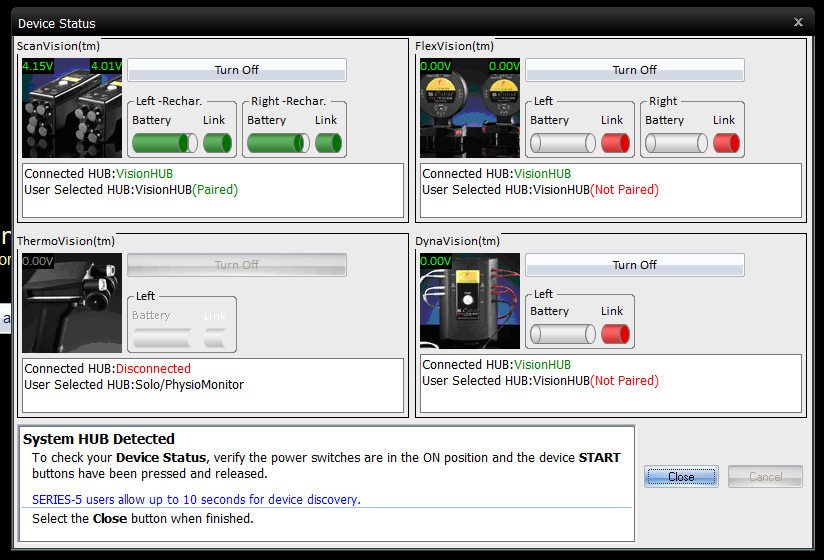
1. Open the Device Status Window
- Setup > Devices > Status (hotkey tip: press control + 2)

2. Remove sticker from the ScanVision device
- Carefully remove the sticker from the Select Switch on the left side of the device to expose the toggle switch.
3. Check switch location
- If the switch is towards the electrodes, the device is configured for the Left
- NOTE: Single ScanVision systems are only configured for Left.
- If the switch is pointing away from electrodes, the device is configured for the Right
4. Use the paperclip or other tool to move the Select switch
- Left Configuration - Place the paperclip on the right side of the select switch and move the switch left toward the electrodes
- Important: If you are configuring for a Single ScanVision system, it must be configured as the Left Device
- Right Configuration - Place the paperclip on the left side of the select switch and move the switch right away from the electrodes
- Important: If you are configuring for a Dual ScanVision system, ensure one device is configured as Left and one device as Right. Make sure the devices are properly labeled!
- The Left configured device will scan the Left side of the spine and the Right configured device will scan the Right side of the spine regardless of the label on the device, make sure they match.
- Important: If you are configuring for a Dual ScanVision system, ensure one device is configured as Left and one device as Right. Make sure the devices are properly labeled!
- The example below shows a ScanVision configured for Left

5. Power cycle the device
- Using the paperclip or similar tool, turn the ScanVision Travel/Power Switch to the OFF position, then back into the ON position. This is Required!

6. Confirm Configuration
- Click the Start Button to turn on the ScanVision and confirm the device shows properly in the Device Status Screen from Step 1
- The example below shows two successfully configured ScanVisions for Left and Right configurations
- The example below shows two successfully configured ScanVisions for Left and Right configurations
