Summary
This guide will show you merge an older database with a new database, that has patients in it.
Note: If the new database does not have new patients in it You can use the guide at the link provided below to backup and restore your old MyoVision database to your new computer.
Backing Up and Restoring Patient Database
If you are trying to have multiple databases on a network sync their data you will want to read our guide on Configuring a Network Database in Your Office for MyoVision.
Each step must be fully completed in order to prevent any data loss.
Click on the buttons inside the tabbed menu to view the steps for merging databases:
Step 1: Export Patient Data
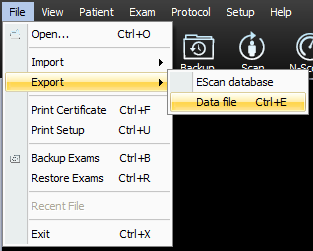
First you will want to export your patient database,
- Open the File menu then go down to Export and select Data file
- Select all the clients in the list, to do this hold down the Shift key then click on the patient at the top of the list.
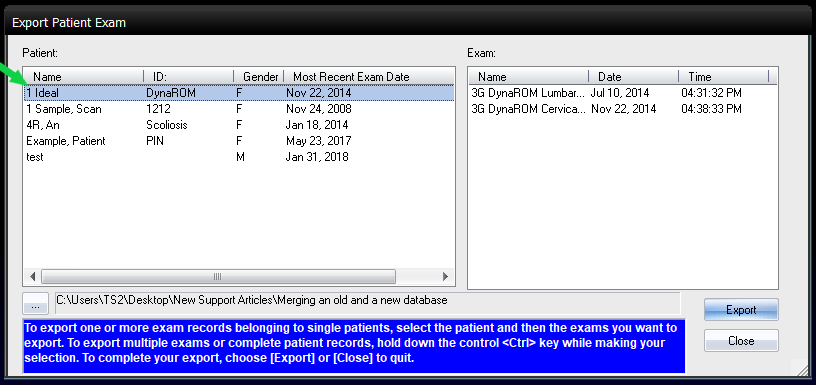 While still holding down the Shift key select the patient at the bottom of the list.
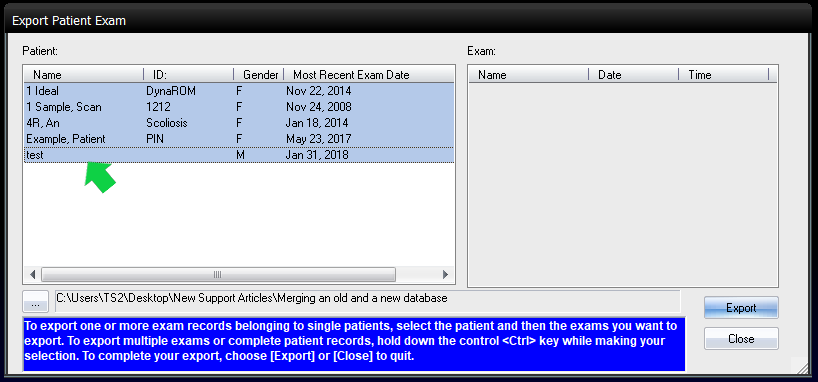
- By default the MyoVision software will export patient data to the MyoVision folder on the computer (C:\\Winscan98).
This can be changed by click on the button marked three ellipsis.
- Once you've selected where you want to save your exams to click Export.
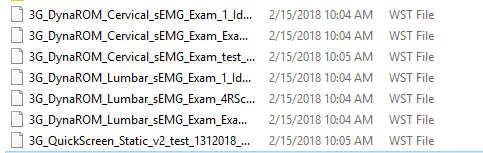
- Once you've exported your exams navigate to the same location using File Explorer and make sure that the exams were exported properly.

 While still holding down the Shift key select the patient at the bottom of the list.


Step 2: Backup the Database
The next step is to back up the database, that is going to be merged with the database that was exported in Step 1.
- Open the File menu and select Backup Exams or click the Backup button on the top of the software.
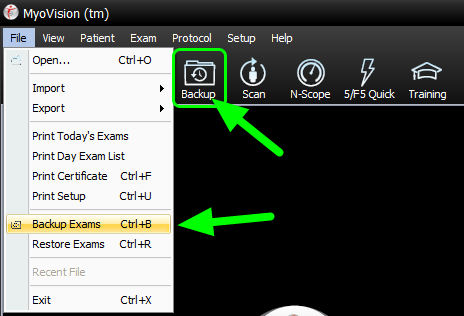
- Choose the location that you want to save your backup to, enter the name you want to have for your back up, then click Save.

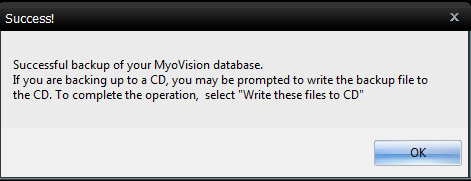
- You will get a prompt telling if the backup was successful. Click OK.
- Locate your backup using File Explorer to verify that it was made successfully.


Step 3: Restore the the Backup
In this step we're going to restoring the back up, made in Step 2, on the computer that your merging your database on.
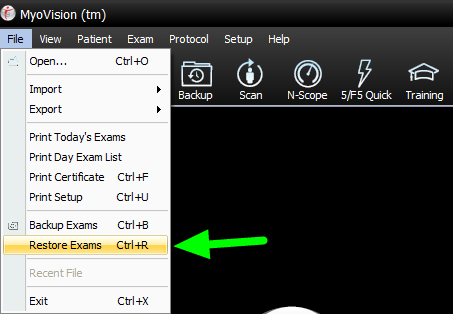
- Inside the MyoVision software open the File menu then select Restore Exams.
- A warning will pop up informing you that the software will erase your current database before it restores your backup. Click OK to continue.
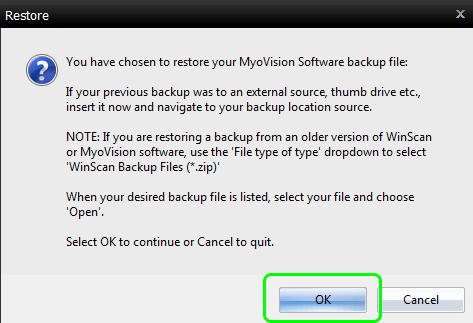
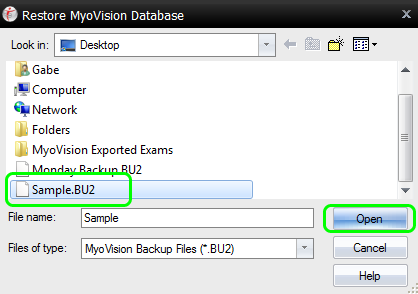
- Navigate to the backup created in Step 2, select it, and click Open.
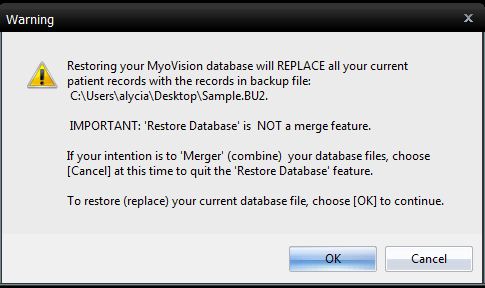
- Another warning will pop-up informing you that you are about to replace your database with the one currently stored in the backup you're restoring. Click OK to continue.
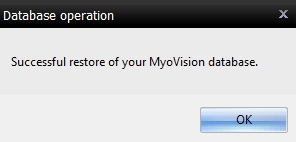
- You will receive a prompt informing you if your backup was restored successfully. If the backup fails to restore properly. Repeat Step 2 and then repeat this step with the new backup.
- Open an exam to make sure that the backup was restored properly.


Step 4: Re-Import Your Exams
The last step in merging your databases is going to be to import your previously exported your exams, from Step 1, back into the MyoVision Software.
- Click to open the File menu, then move the mouse over Import and select Individual Files or Files from folder (note that you can use the CTRL+I shortcut to access the import menu).
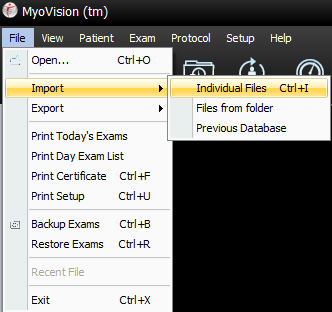 Individual Files will allow you to import exams one at a time. Files from folder will import all the exams in the folder that you choose.
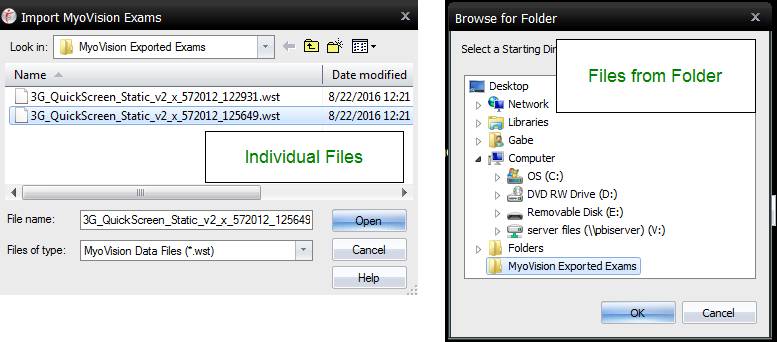
- Navigate to where you saved your exams in Step 1. Once you've selected the folder that your exams are saved in, or the exams that you want to import, click OK or Open as shown in the images above.
- Once your exams have been imported, open an exam to verify that your databases have been merged.
 Individual Files will allow you to import exams one at a time. Files from folder will import all the exams in the folder that you choose.
